> ## Documentation Index
> Fetch the complete documentation index at: https://docs.celo.org/llms.txt
> Use this file to discover all available pages before exploring further.
# Deploy on Celo with Remix
How to deploy a smart contract to Celo testnet, Mainnet, or a local network using [Remix](https://remix.ethereum.org/).
***
## Introduction to Remix
The [Remix IDE](https://remix-project.org/) is an open-source web and desktop application for creating and deploying Smart Contracts. Originally created for Ethereum, it fosters a fast development cycle and has a rich set of plugins with intuitive GUIs. Remix is used for the entire journey of contract development and is a playground for learning and teaching Celo.
In this guide, you will learn to deploy a smart contract on Celo using [remix.ethereum.org](http://remix.ethereum.org).
For Celo L1 Remix does not support Solidity compiler version `0.8.20` and above for EVM versions above **Paris**. If you try to deploy a smart contract with a higher version, you will receive this error message:
```bash theme={null}
Gas estimation errored with the following message (see below). The transaction execution will likely fail. Do you want to force sending?
invalid opcode: opcode 0x5f not defined
The EVM version used by the selected environment is not compatible with the compiler EVM version.
```
A **workaround** is to go into the advanced settings for the compiler in Remix and choose Paris as the EVM version.
For Celo Sepolia everything should be working as on every other EVM compatible chain.
To learn more about the features available to you as a smart contract developer with Remix, visit the [Remix documentation](https://remix-ide.readthedocs.io/en/latest/).
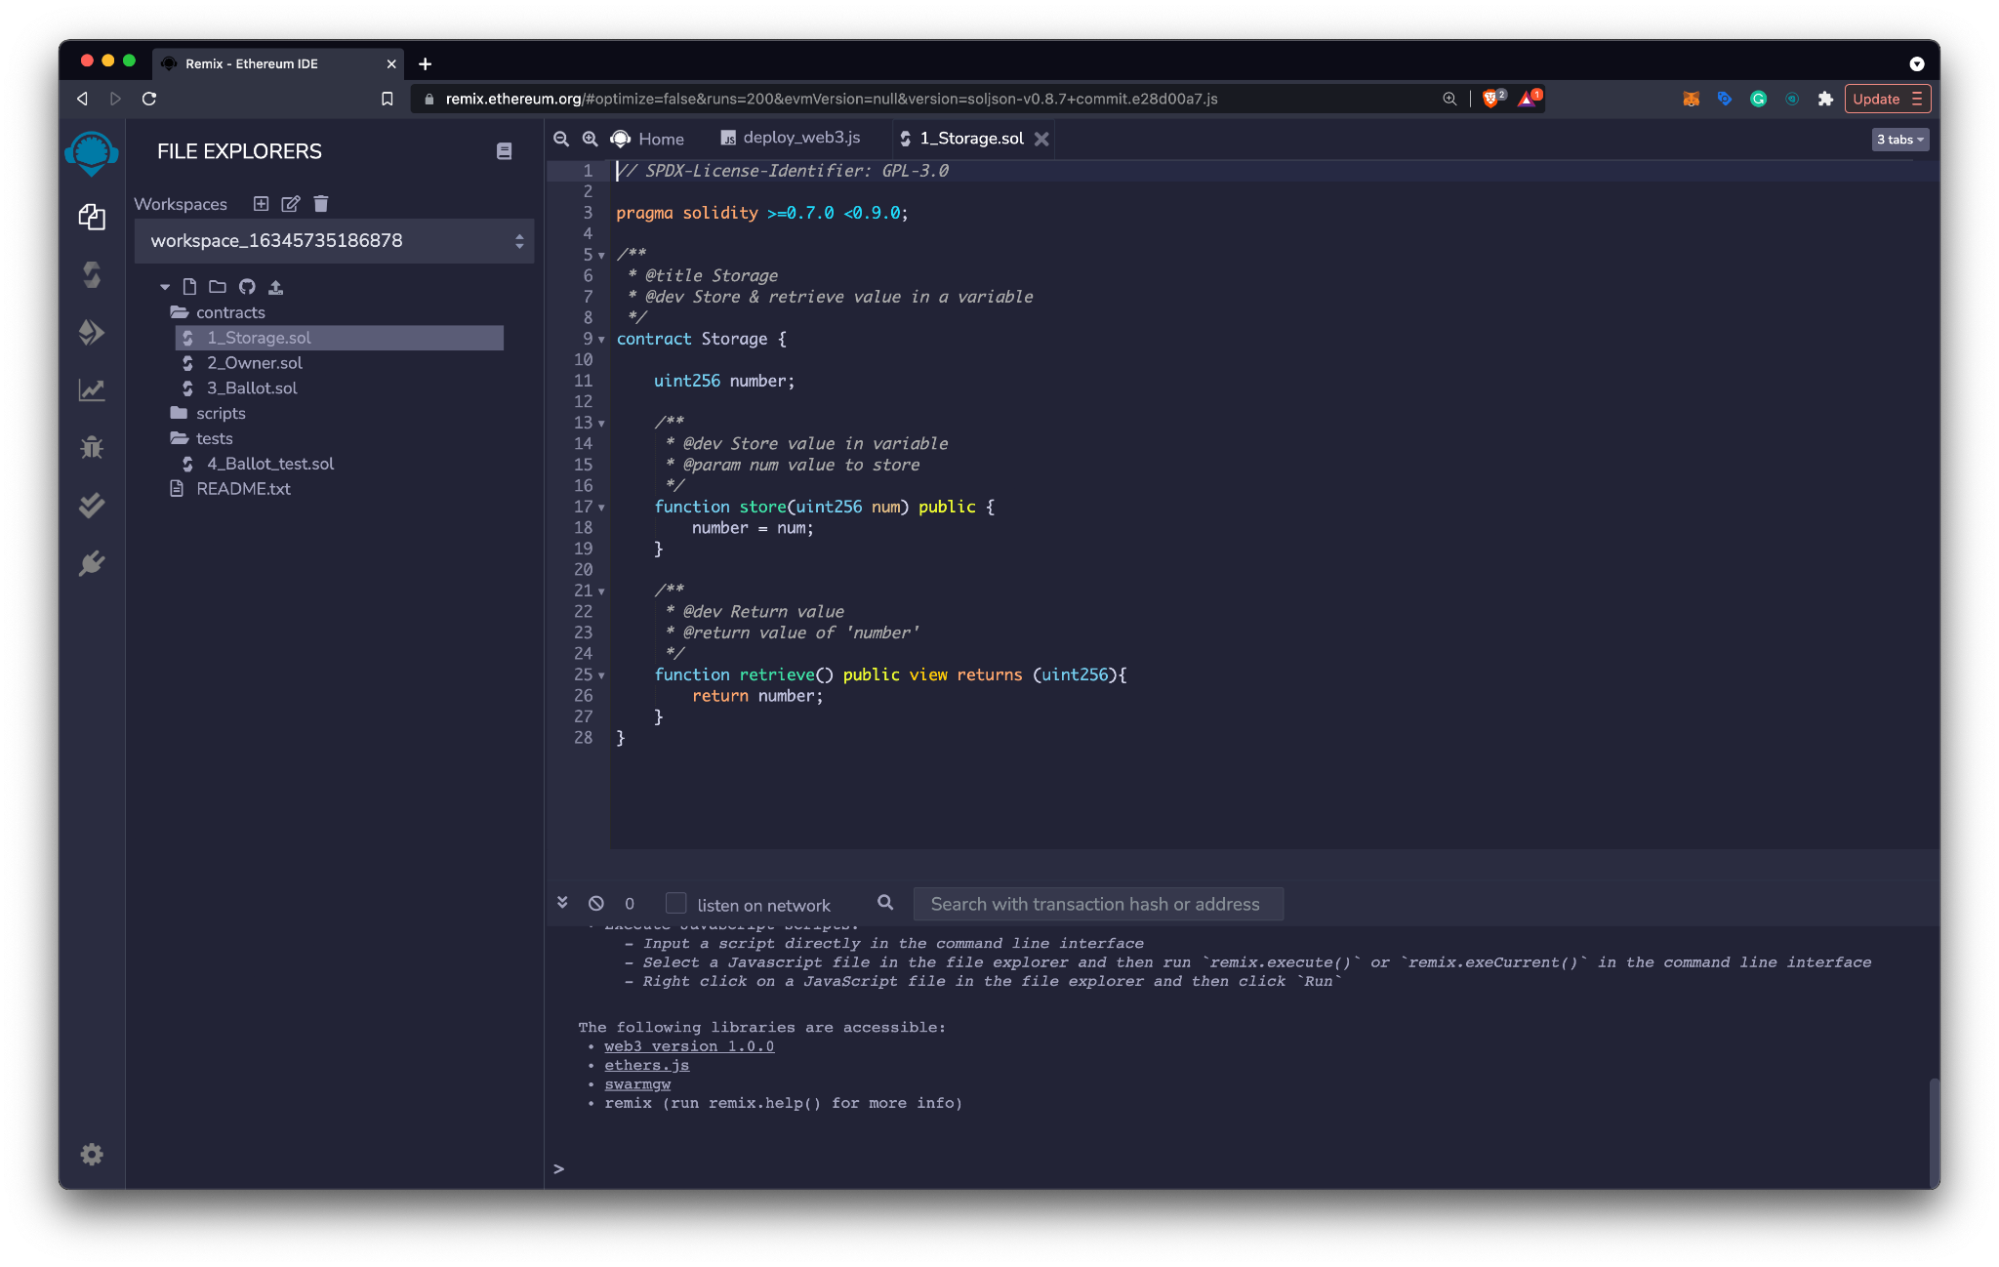
## Create a Smart Contract
* Navigate to [remix.ethereum.org](http://remix.ethereum.org) and select **contracts > 1\_Storage.sol** from the **File Explorers** pane.
* Review the smart contract code and learn more using the [Solidity docs](https://docs.soliditylang.org/en/latest/) or with [Solidity by Example](https://solidity-by-example.org/).
* Complete any changes to your smart contract and save the final version (Command/Ctrl + S).
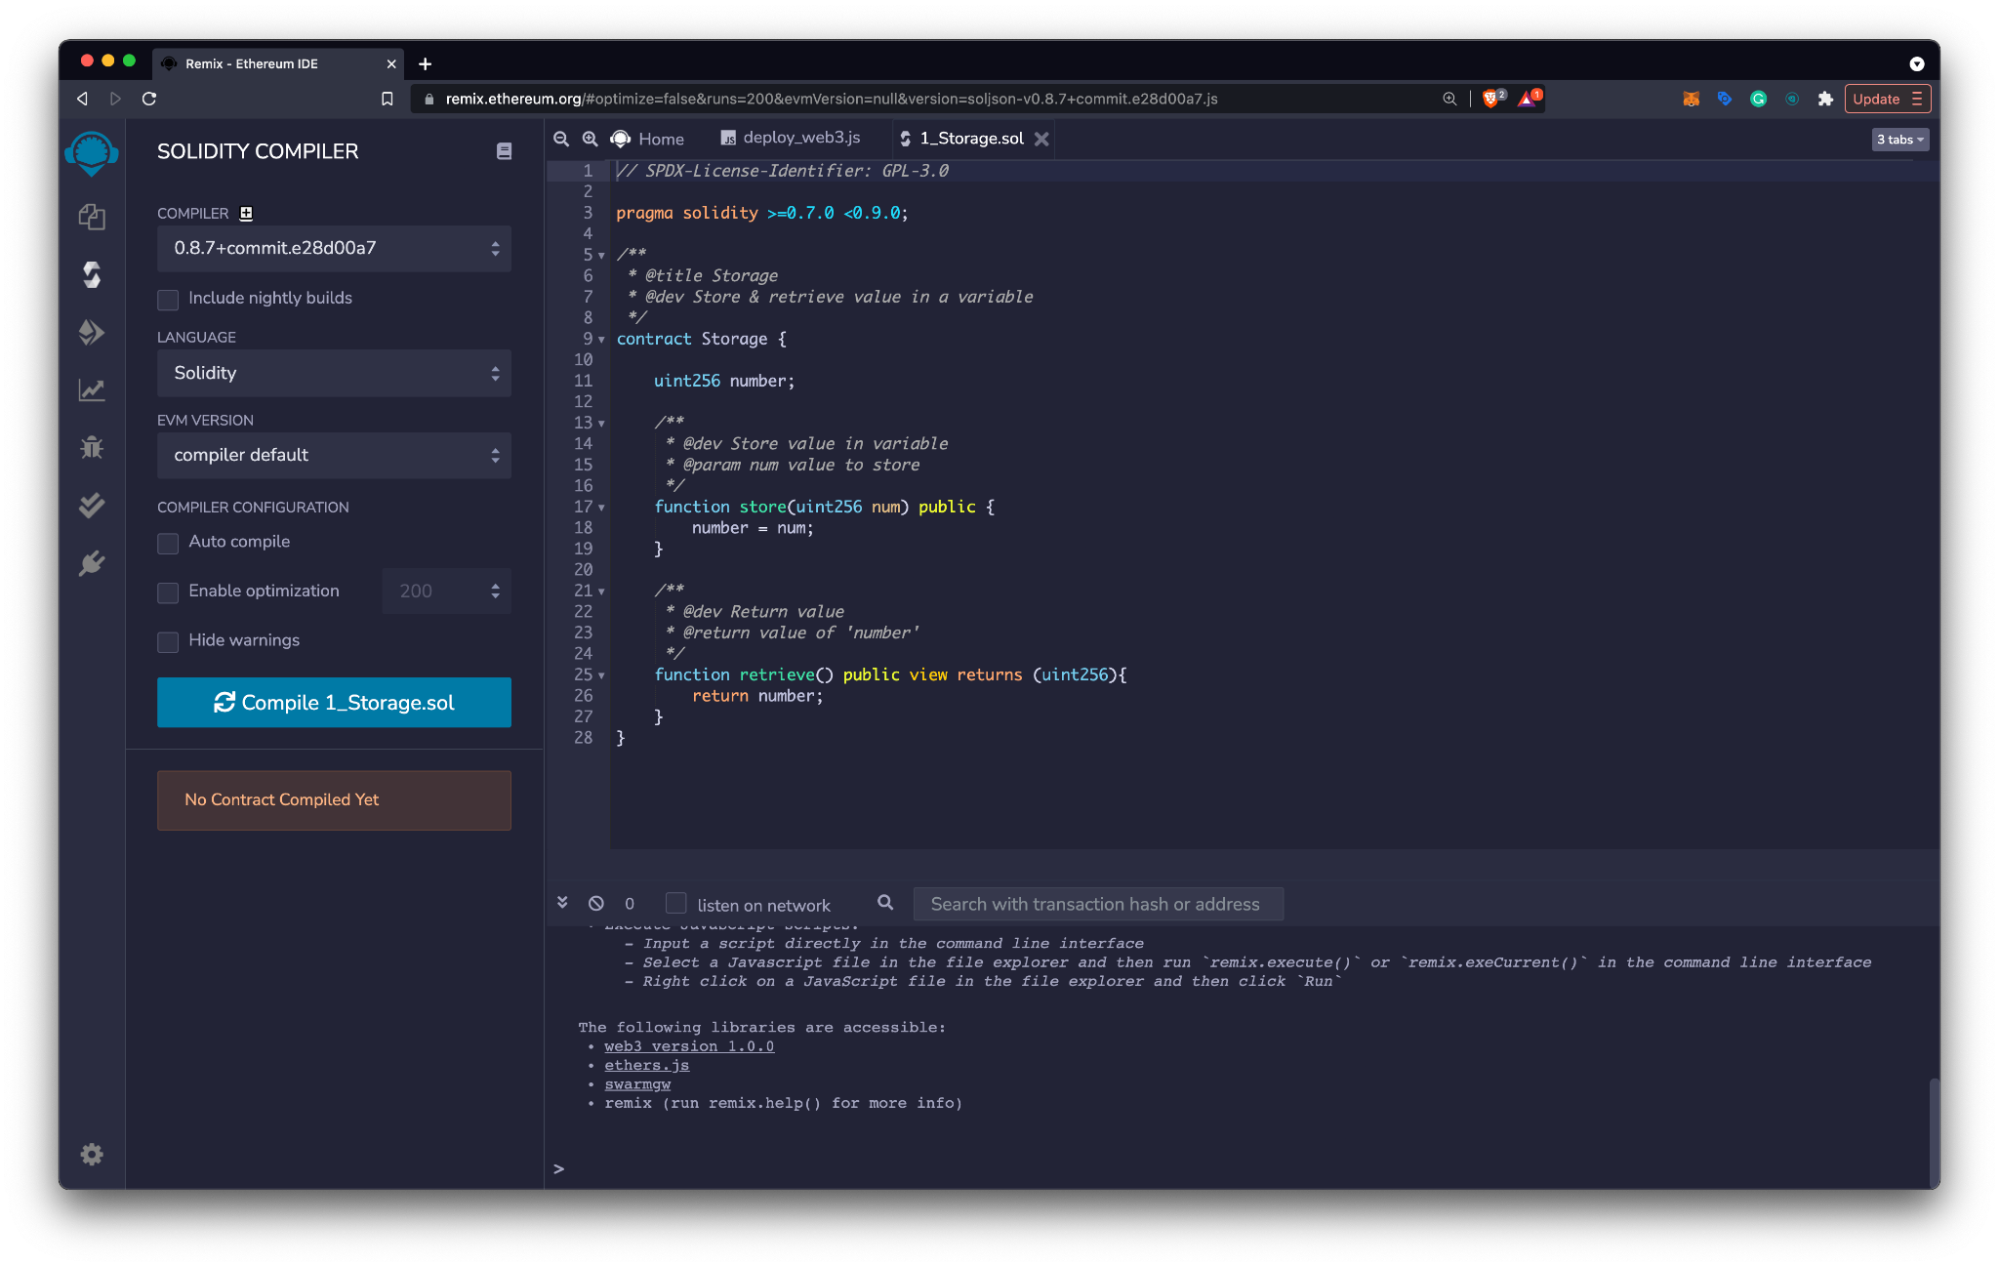
 ## Compile the Contract
* Choose the **Solidity Compiler Icon** on the left side menu.
* Check that your compiler version is within the versions specified in the **pragma solidity statement**.
* Select the **Compile** button to compile your smart contract.
## Compile the Contract
* Choose the **Solidity Compiler Icon** on the left side menu.
* Check that your compiler version is within the versions specified in the **pragma solidity statement**.
* Select the **Compile** button to compile your smart contract.
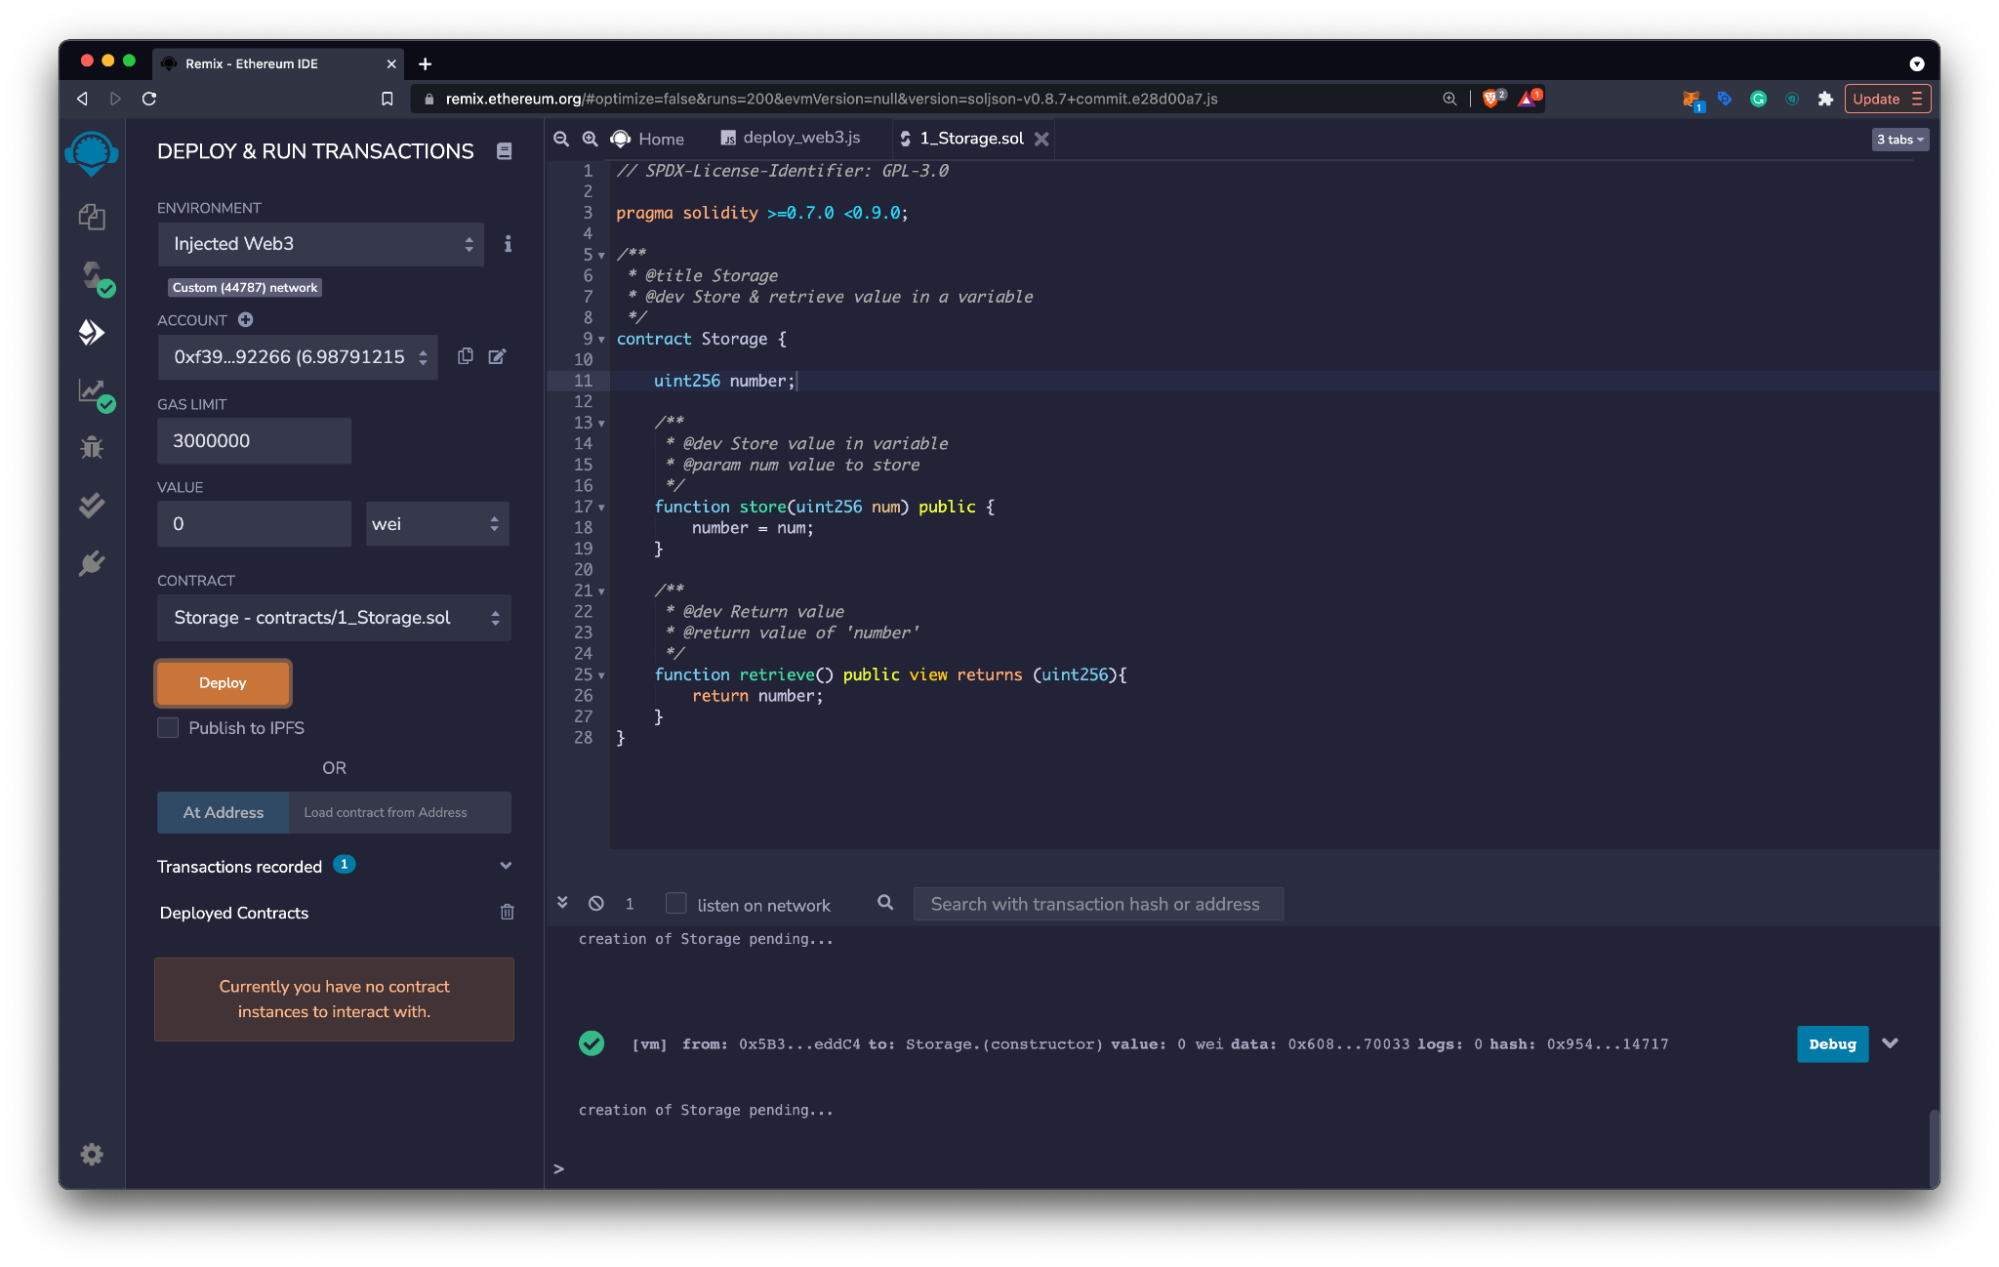
 ## Deploy the Contract
* Click the **Deploy and Run Transactions Icon** on the left side menu.
* Choose **Injected Web3** as your environment.
* [Connect MetaMask to Celo](/wallet/metamask/use) testnet and verify that the environment reads:
* **Custom (11142220) network** for Celo Sepolia testnet
* **Custom (42220) network** for Celo Mainnet
* Click **Deploy** and select **Confirm** in the MetaMask notification window to pay for the transaction
## Deploy the Contract
* Click the **Deploy and Run Transactions Icon** on the left side menu.
* Choose **Injected Web3** as your environment.
* [Connect MetaMask to Celo](/wallet/metamask/use) testnet and verify that the environment reads:
* **Custom (11142220) network** for Celo Sepolia testnet
* **Custom (42220) network** for Celo Mainnet
* Click **Deploy** and select **Confirm** in the MetaMask notification window to pay for the transaction
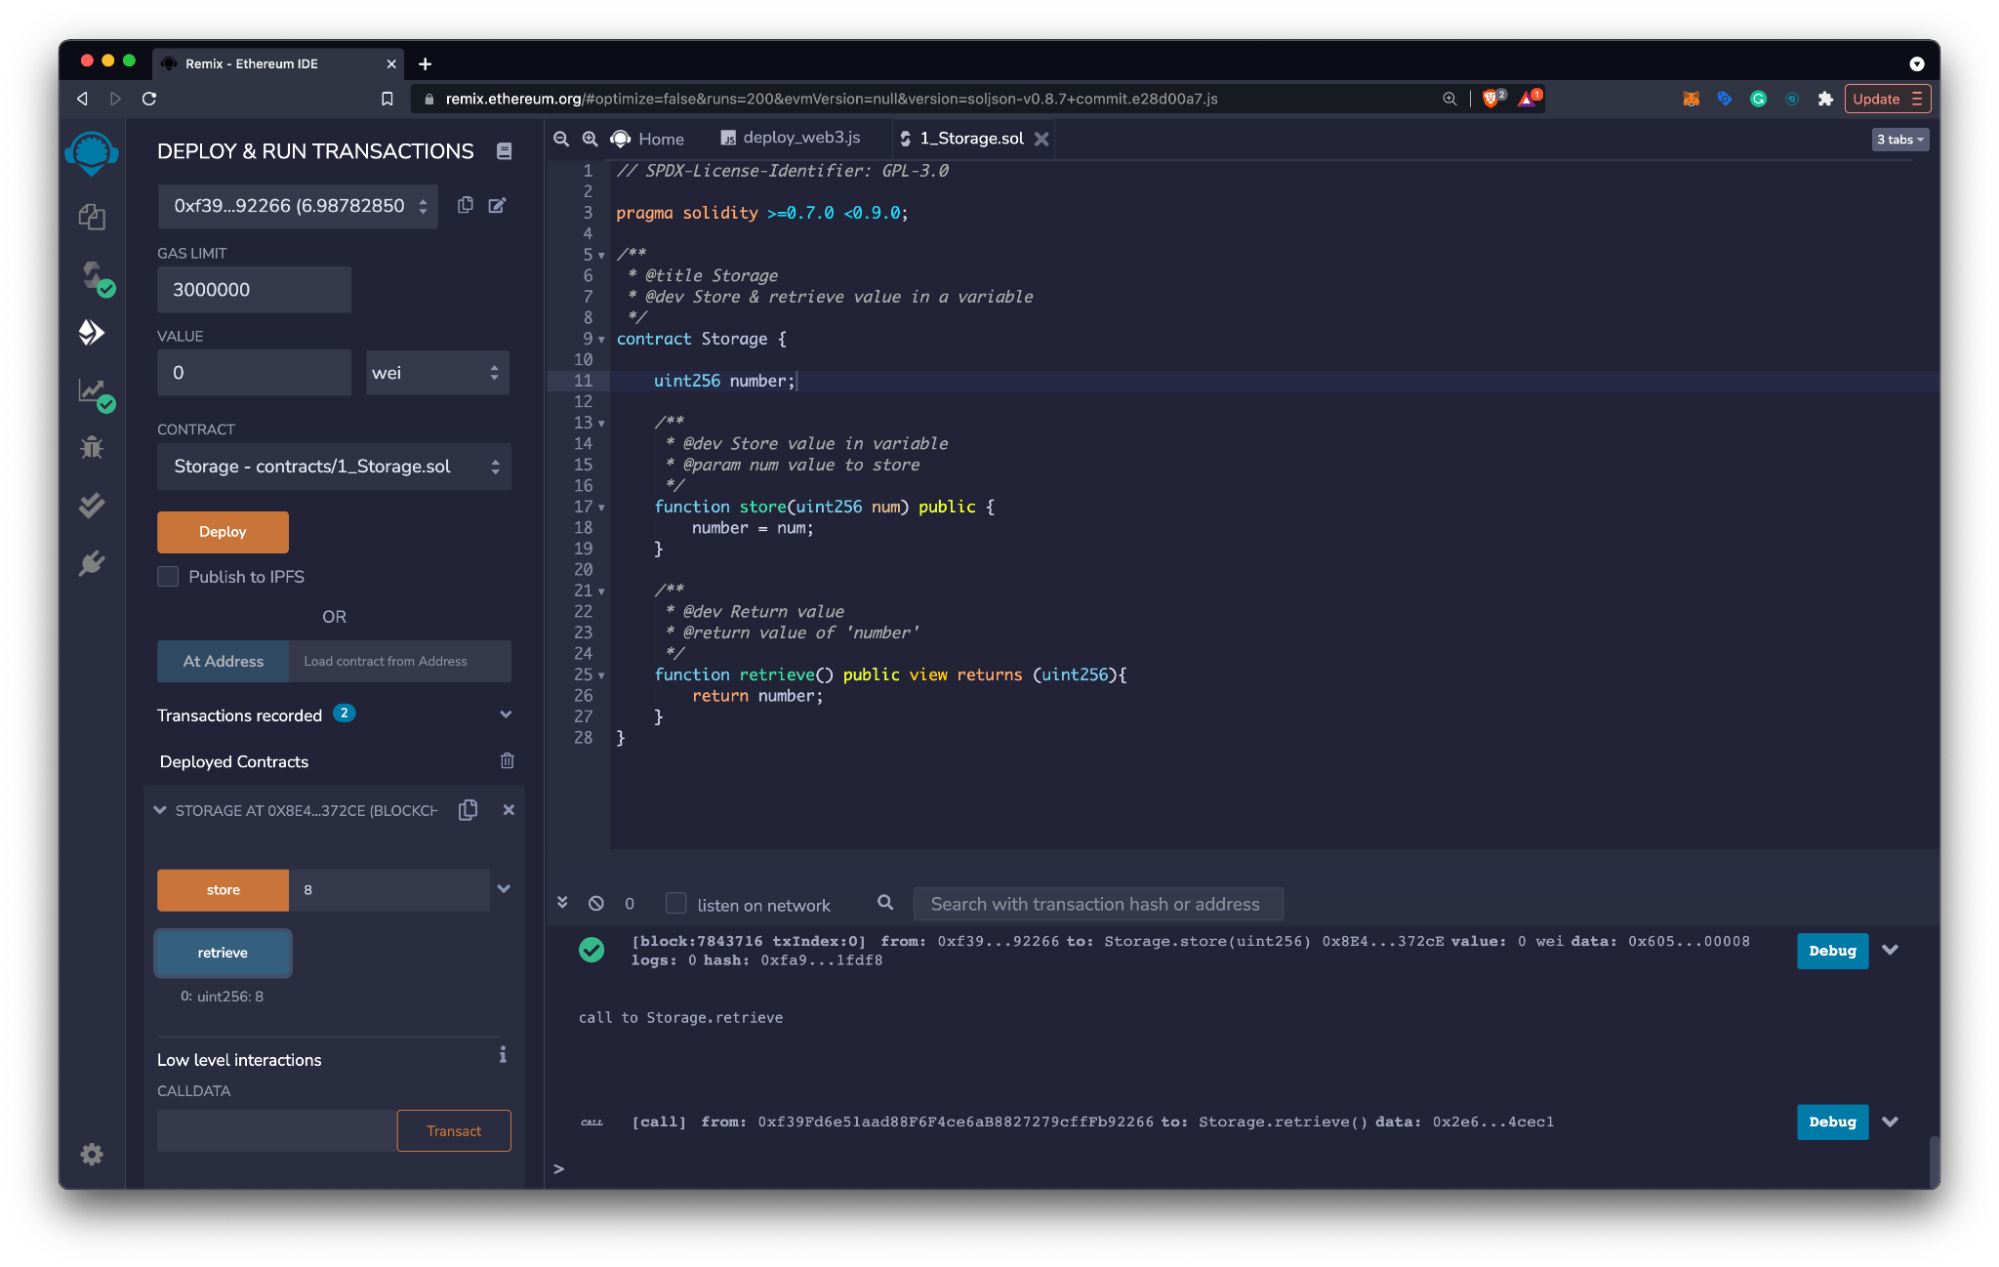
 ## Interacting with the Contract
* Select the **dropdown** on the newly deployed contract at the bottom of the left panel.
* View the deployed contract’s functions using the **Deployed Contracts** window.
* Select functions to read or write on the Celo testnet using the function inputs as needed.
* Confirm write transactions in the **MetaMask Notification Window** to pay the transaction’s gas fee.
## Interacting with the Contract
* Select the **dropdown** on the newly deployed contract at the bottom of the left panel.
* View the deployed contract’s functions using the **Deployed Contracts** window.
* Select functions to read or write on the Celo testnet using the function inputs as needed.
* Confirm write transactions in the **MetaMask Notification Window** to pay the transaction’s gas fee.
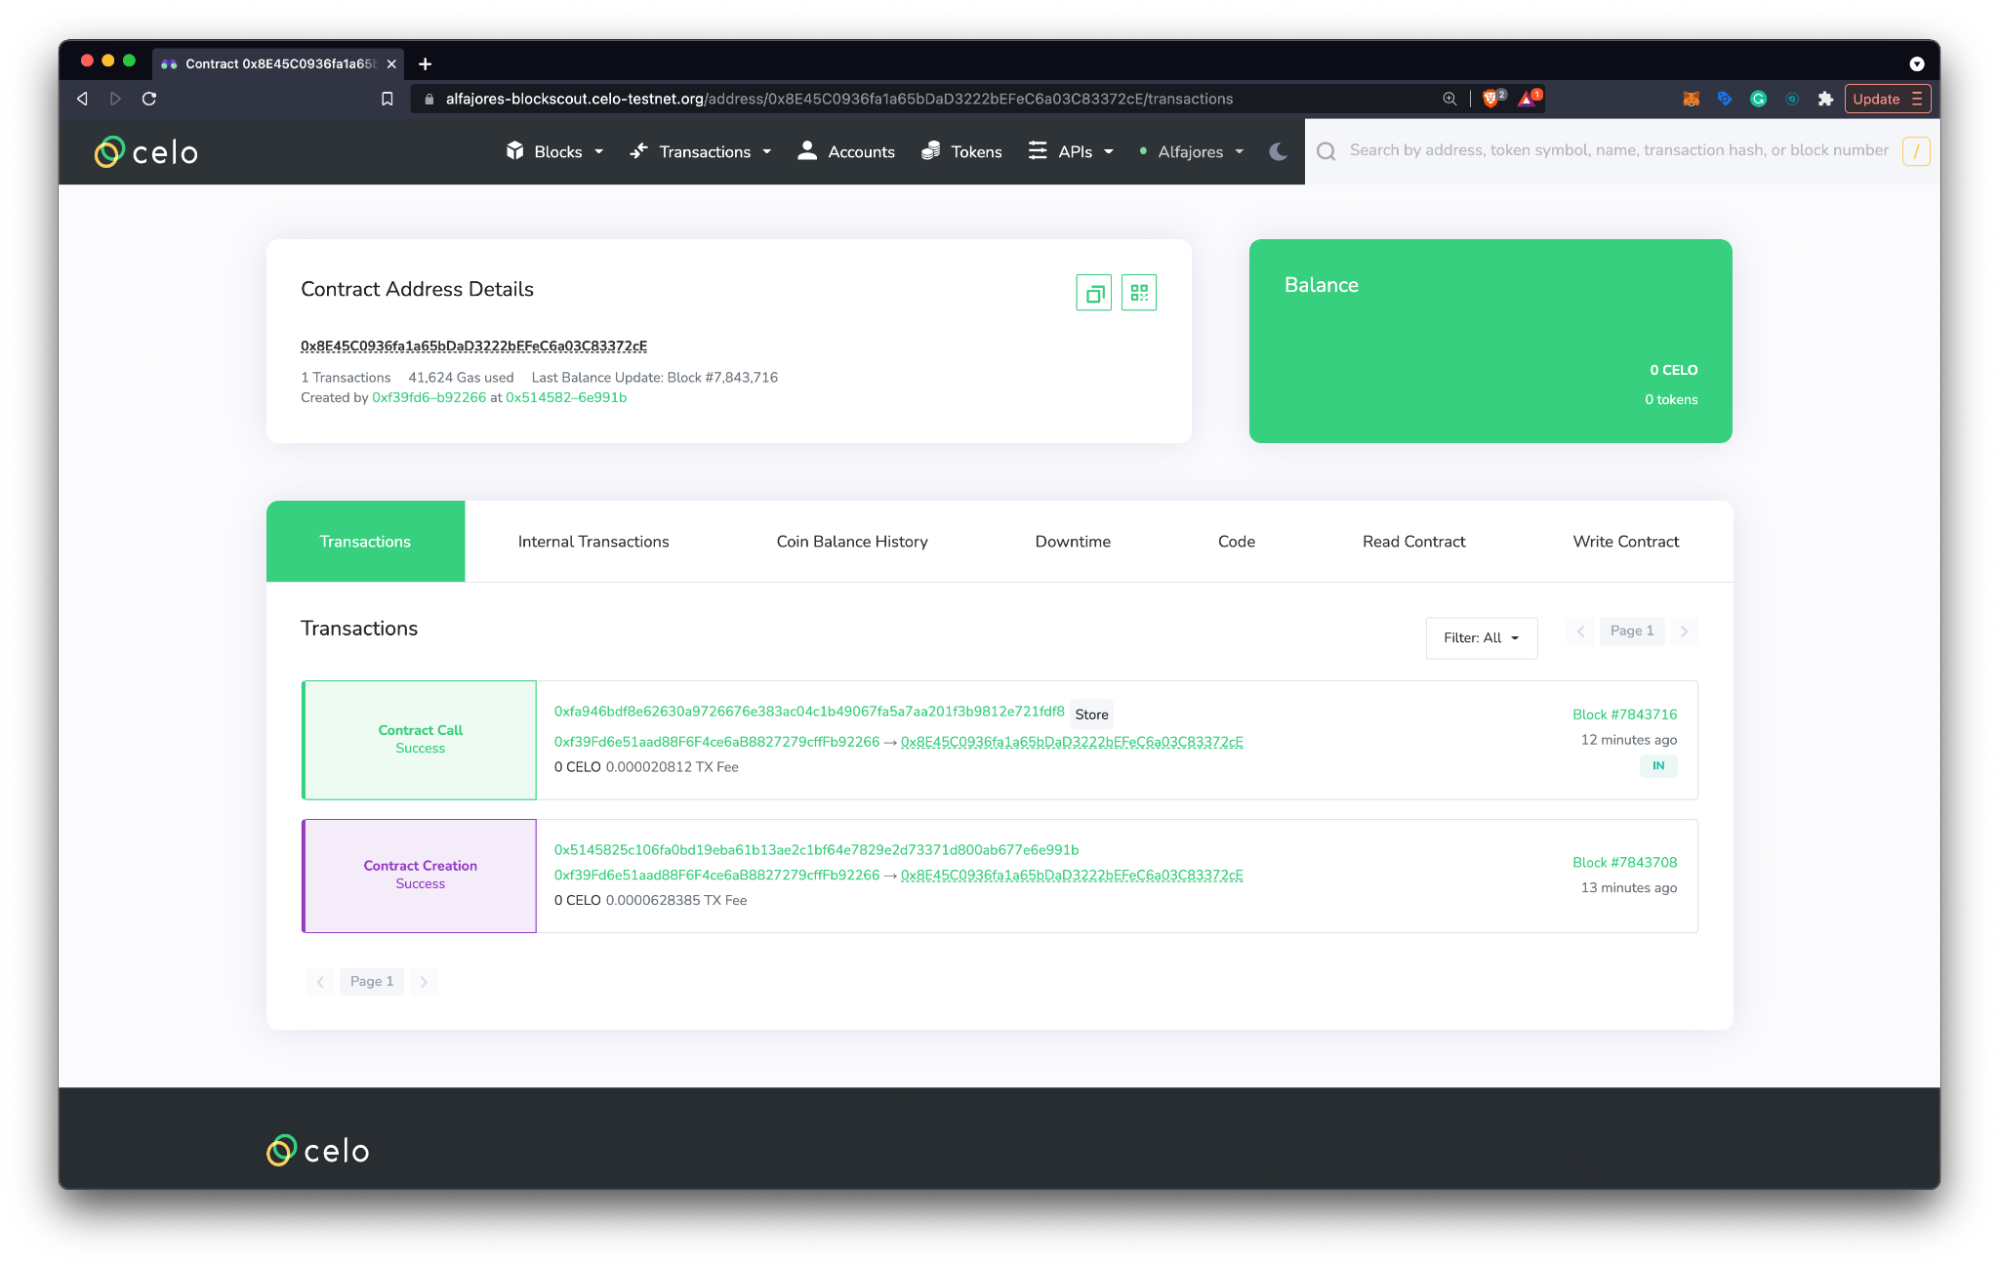
 ## View Contract Details
* Copy the contract address from the **Deployed Contracts** window on the left panel.
* Navigate to the [Celo Block Explorer](https://celo.blockscout.com/) and use the contract address to search for your contract.
* Explore the details of your deployed smart contract and learn more about the explorer [here](http://docs.blockscout.com).
## View Contract Details
* Copy the contract address from the **Deployed Contracts** window on the left panel.
* Navigate to the [Celo Block Explorer](https://celo.blockscout.com/) and use the contract address to search for your contract.
* Explore the details of your deployed smart contract and learn more about the explorer [here](http://docs.blockscout.com).
 ## Verify Contracts on Celo
* [Using Blockscout](/developer/verify/blockscout)
* [Using Remix](/developer/verify/remix)
* [Using CeloScan](/developer/verify/celoscan)
* [Using Hardhat](/developer/verify/hardhat)
## Verify Contracts on Celo
* [Using Blockscout](/developer/verify/blockscout)
* [Using Remix](/developer/verify/remix)
* [Using CeloScan](/developer/verify/celoscan)
* [Using Hardhat](/developer/verify/hardhat)