How to deploy a smart contract to Celo testnet, Mainnet, or a local network using Replit.
Introduction to Replit
Replit is a coding platform that lets you write code and host apps. It also has many educational features built-in, making it great for teachers and learners too. Every repl you create is a fully functional development and production environment. Hosting from your editor makes it easy to iterate quickly on your work, collaborate with others, and get feedback.
Replit added Solidity to its available programming languages, giving all of the features and functionality Replit provides to Web3 developers creating smart contracts. In this guide, you’ll learn how to make use of these features to build and deploy a smart contract on Celo.
To learn more about the features available to you as a smart contract developer with Replit, visit the Replit documentation. Prerequisites
To deploy on Celo using Replit, you don’t need any local environment. You should have a wallet available with testnet funds so that you can deploy and test transactions.
If you are new to Replit, it will also help to review the Solidity announcement and Replit documentation.
Create a Repl
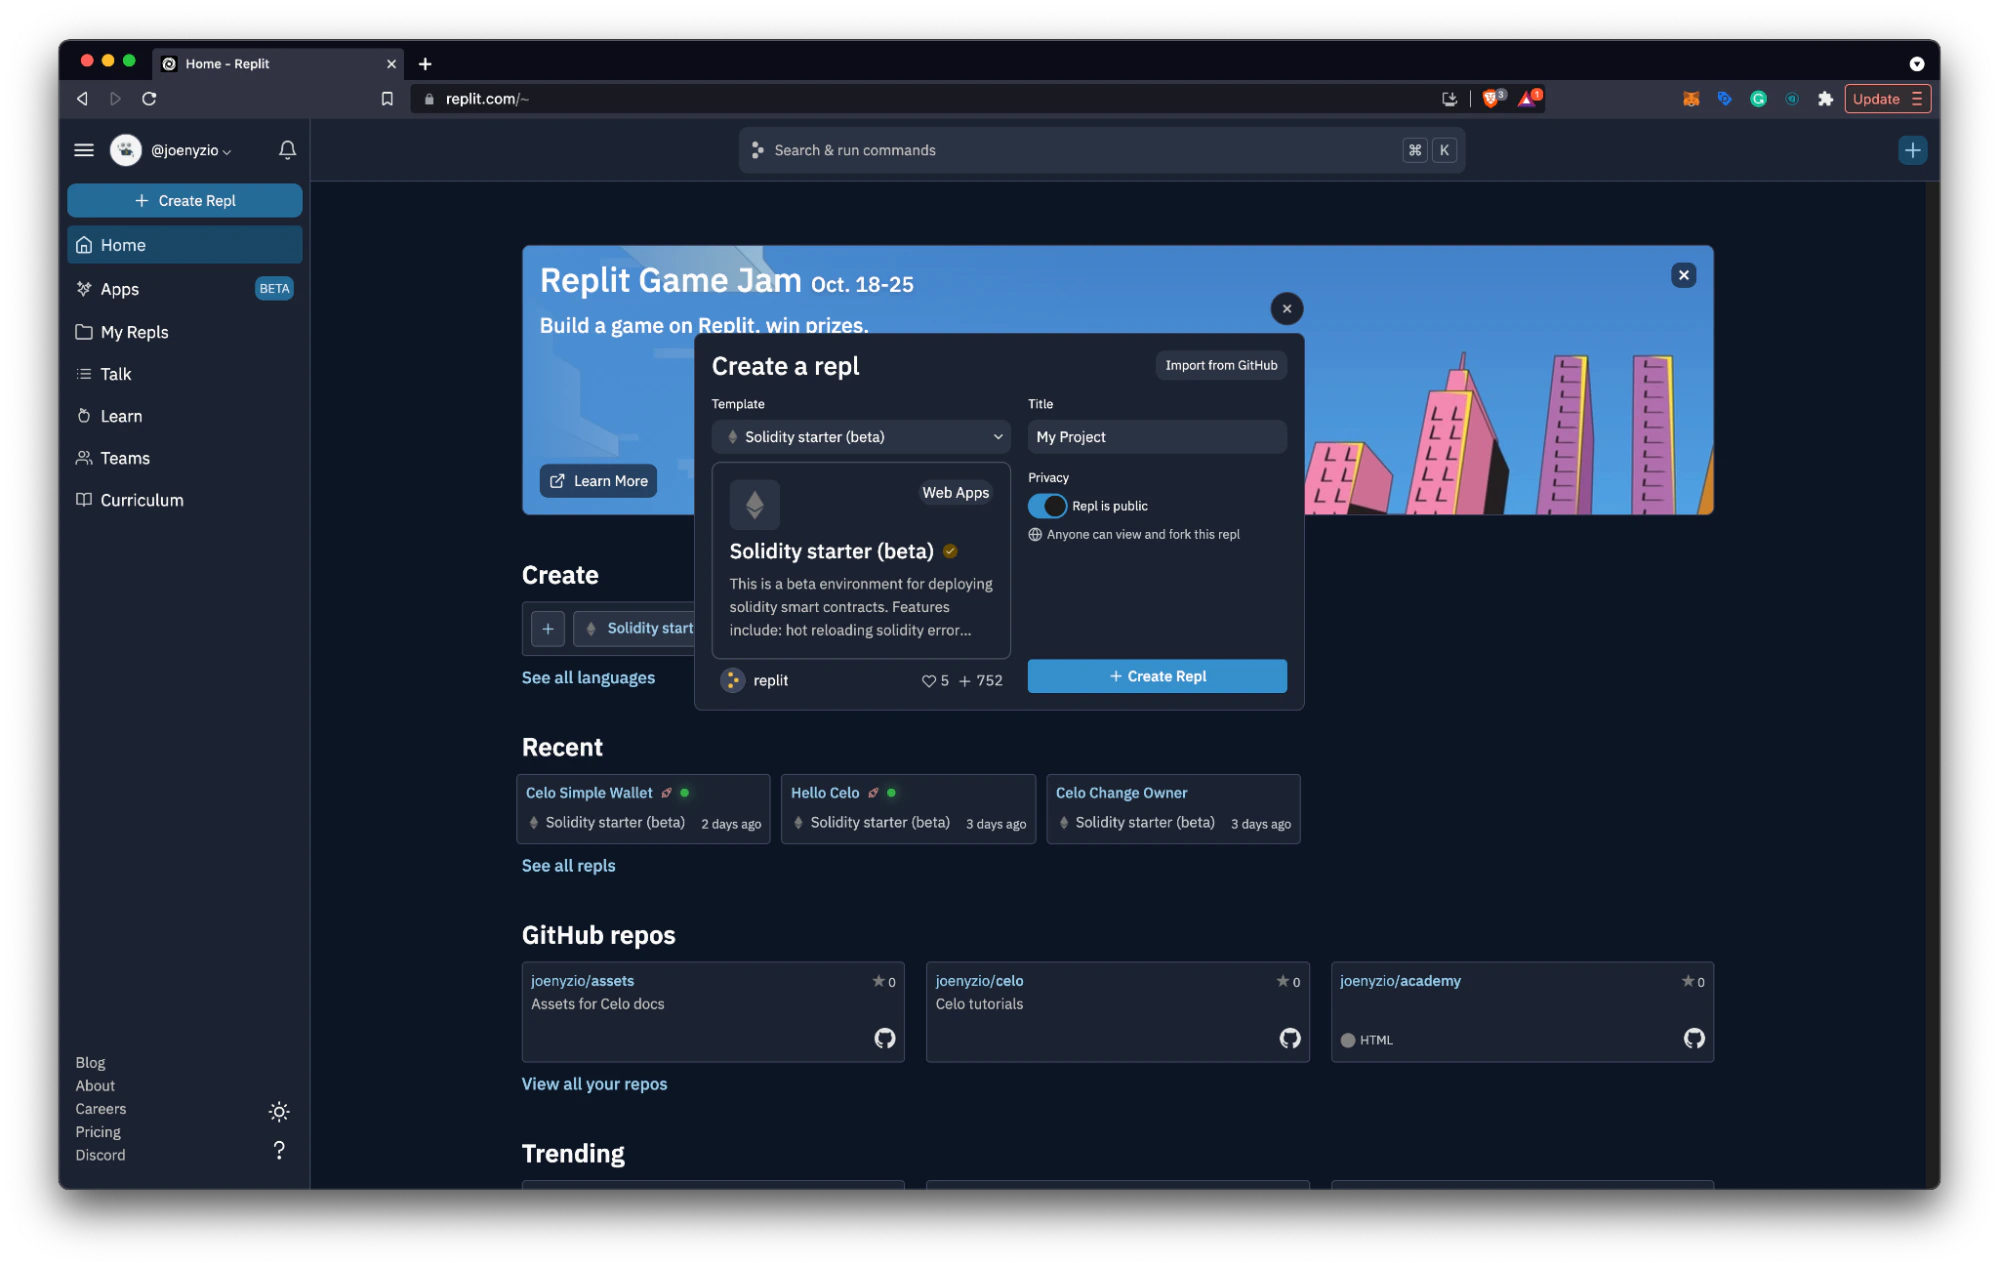
After creating your Replit account, your home screen will include a dashboard where you can view projects, create projects, manage your account, and do many other things. You can get started by creating a new Repl.
- Choose + Create Repl from the left panel or + in the top right corner of the screen
- Select the Solidity starter (beta) template and give your project a title
- Click + Create Repl to create your project
Explore the Workspace
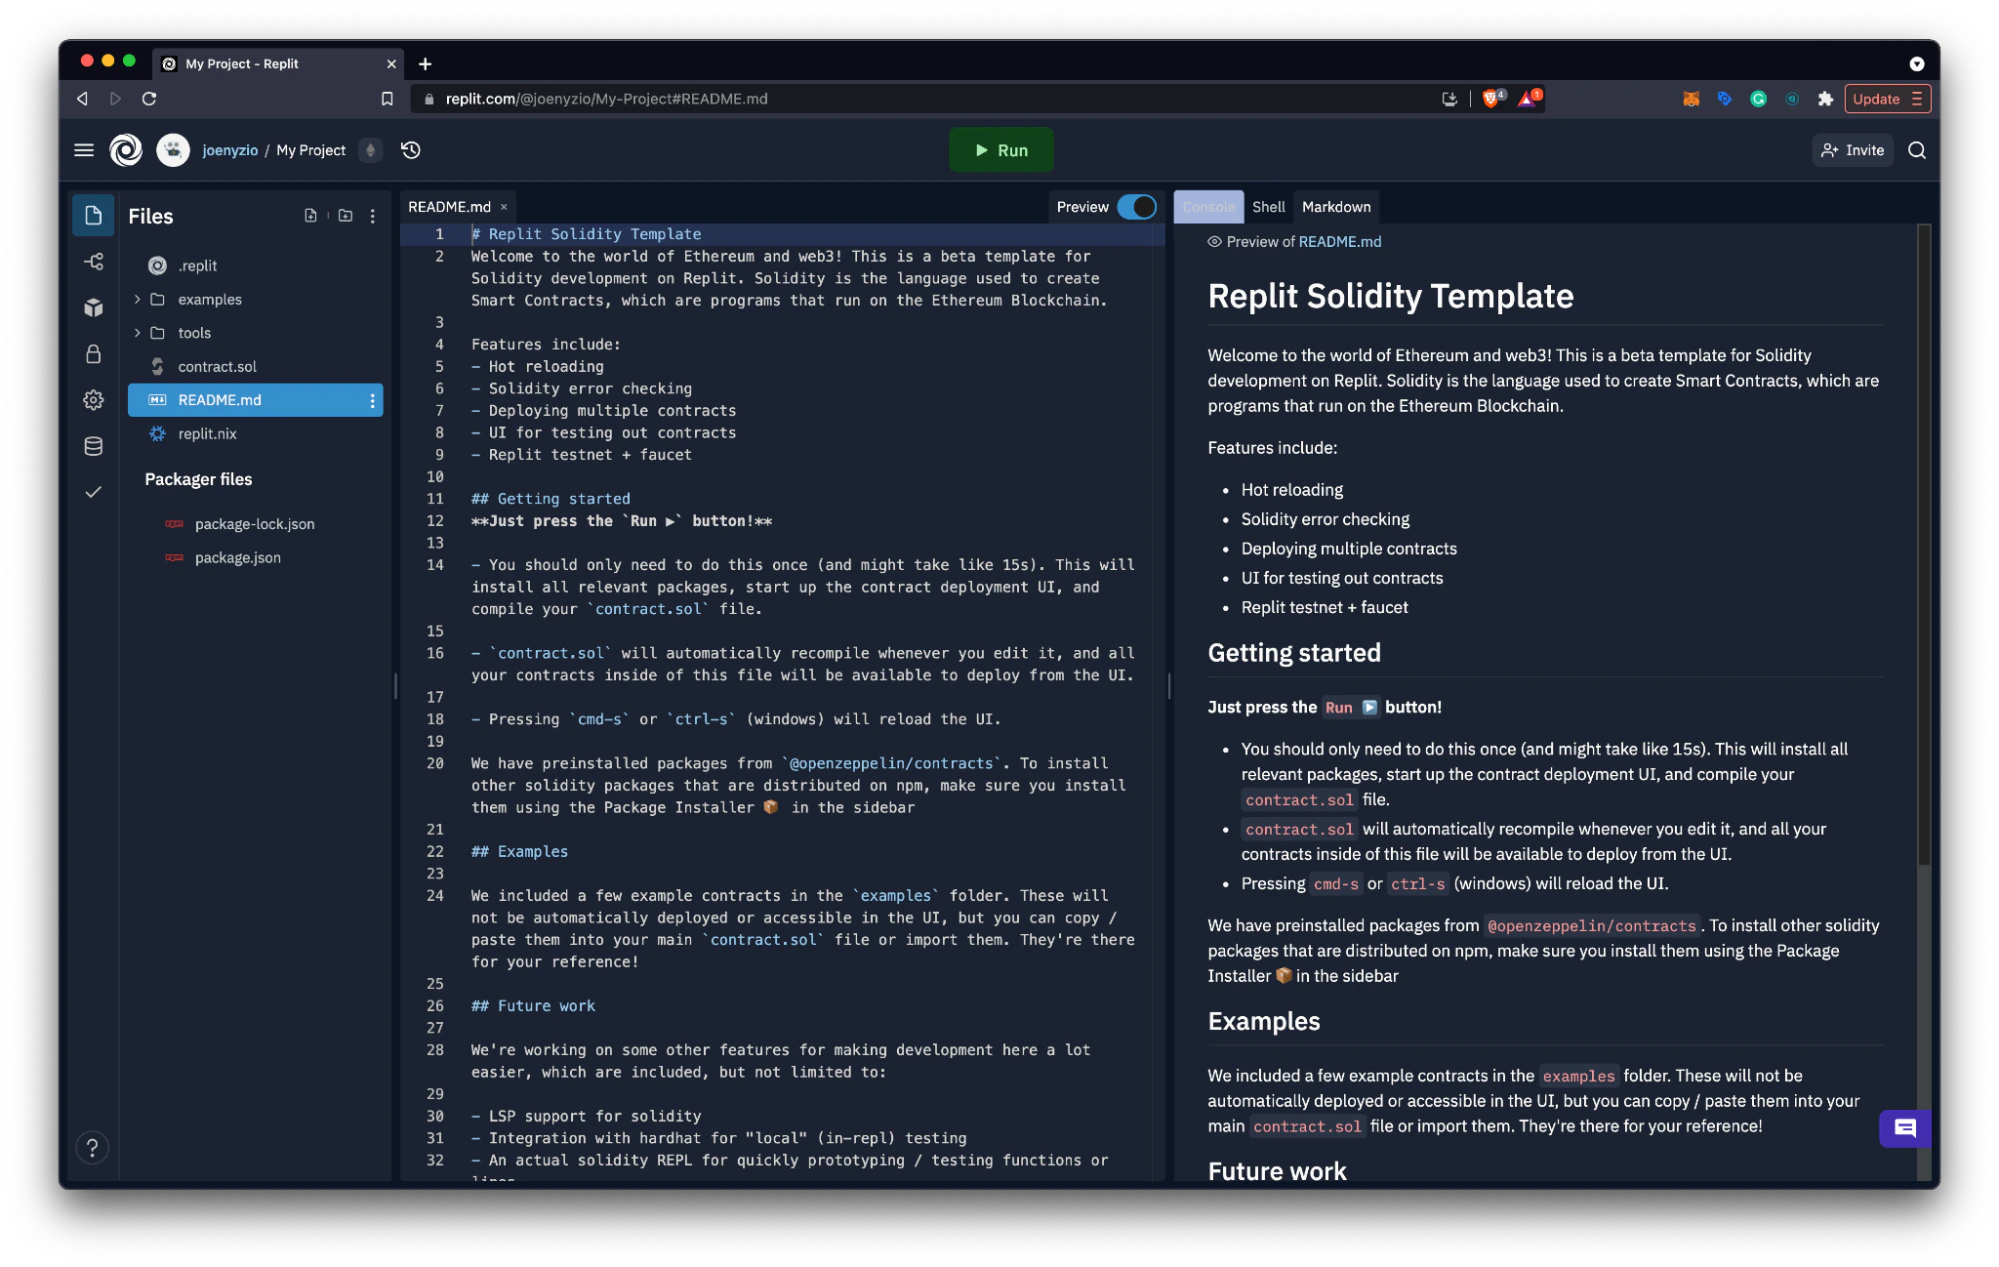
By creating a project, you now have a fully functional online IDE that allows you to edit, view, and deploy your smart contracts. It also creates a front-end for your smart contract that you can publish to an easily sharable URL. Read Solidity on Replit for an overview of some of these features.
The README provides an overview of the workspace and gives details on how to make the most of your Replit experience. Read this to help get more familiar with your workspace.
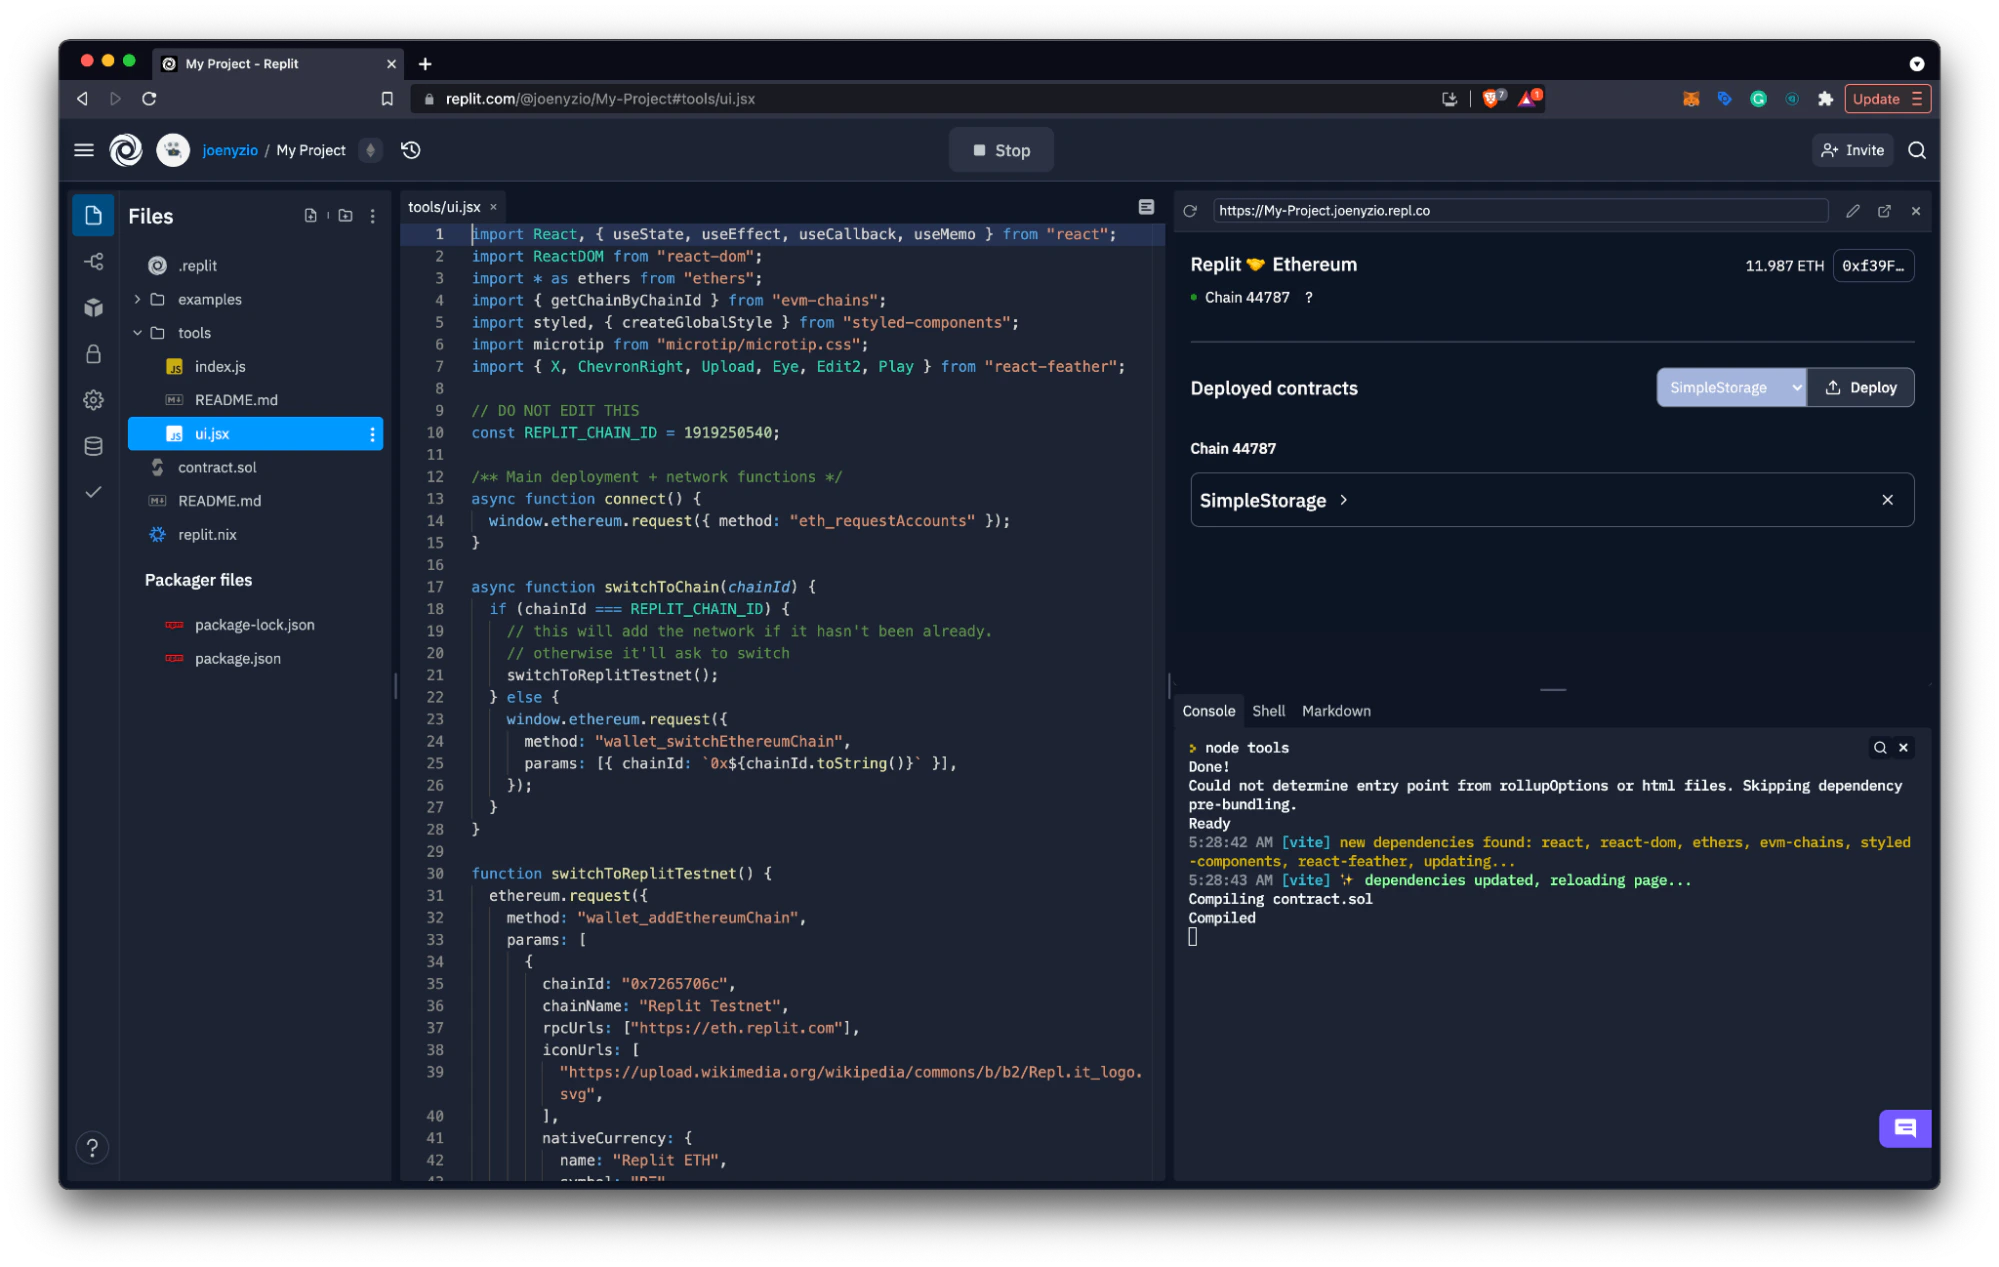
Deploy on Celo
Deploying on Celo with Replit is easy. If you don’t have a wallet with funds, complete Set up a Development Test Wallet so that you are prepared to deploy and interact with your smart contract.
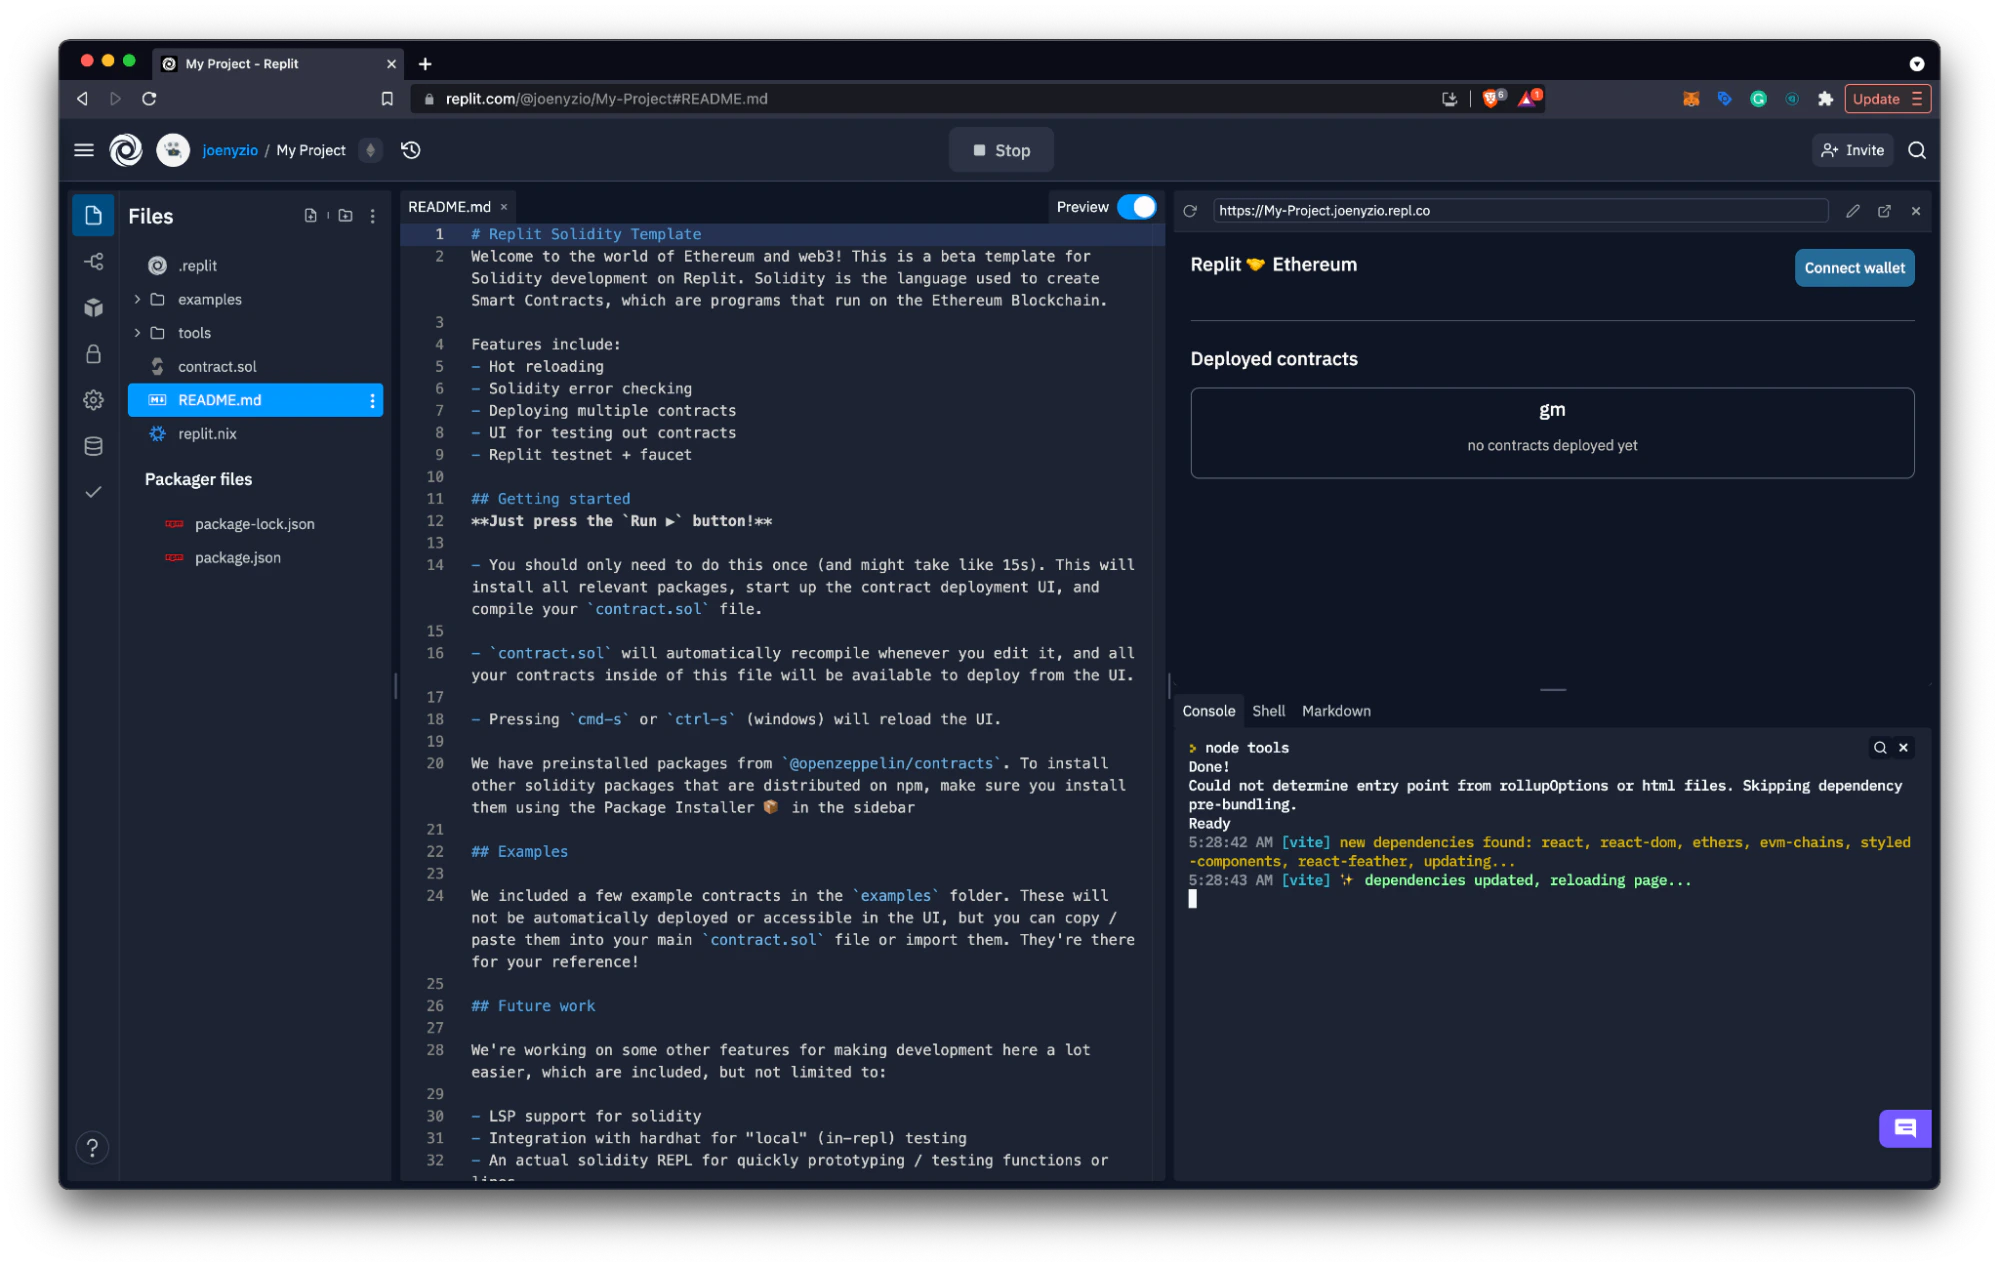
- Select Run to install all relevant packages, start up the contract deployment UI, and compile your contract.sol file
- Select Connect wallet, select your account, then choose Connect.
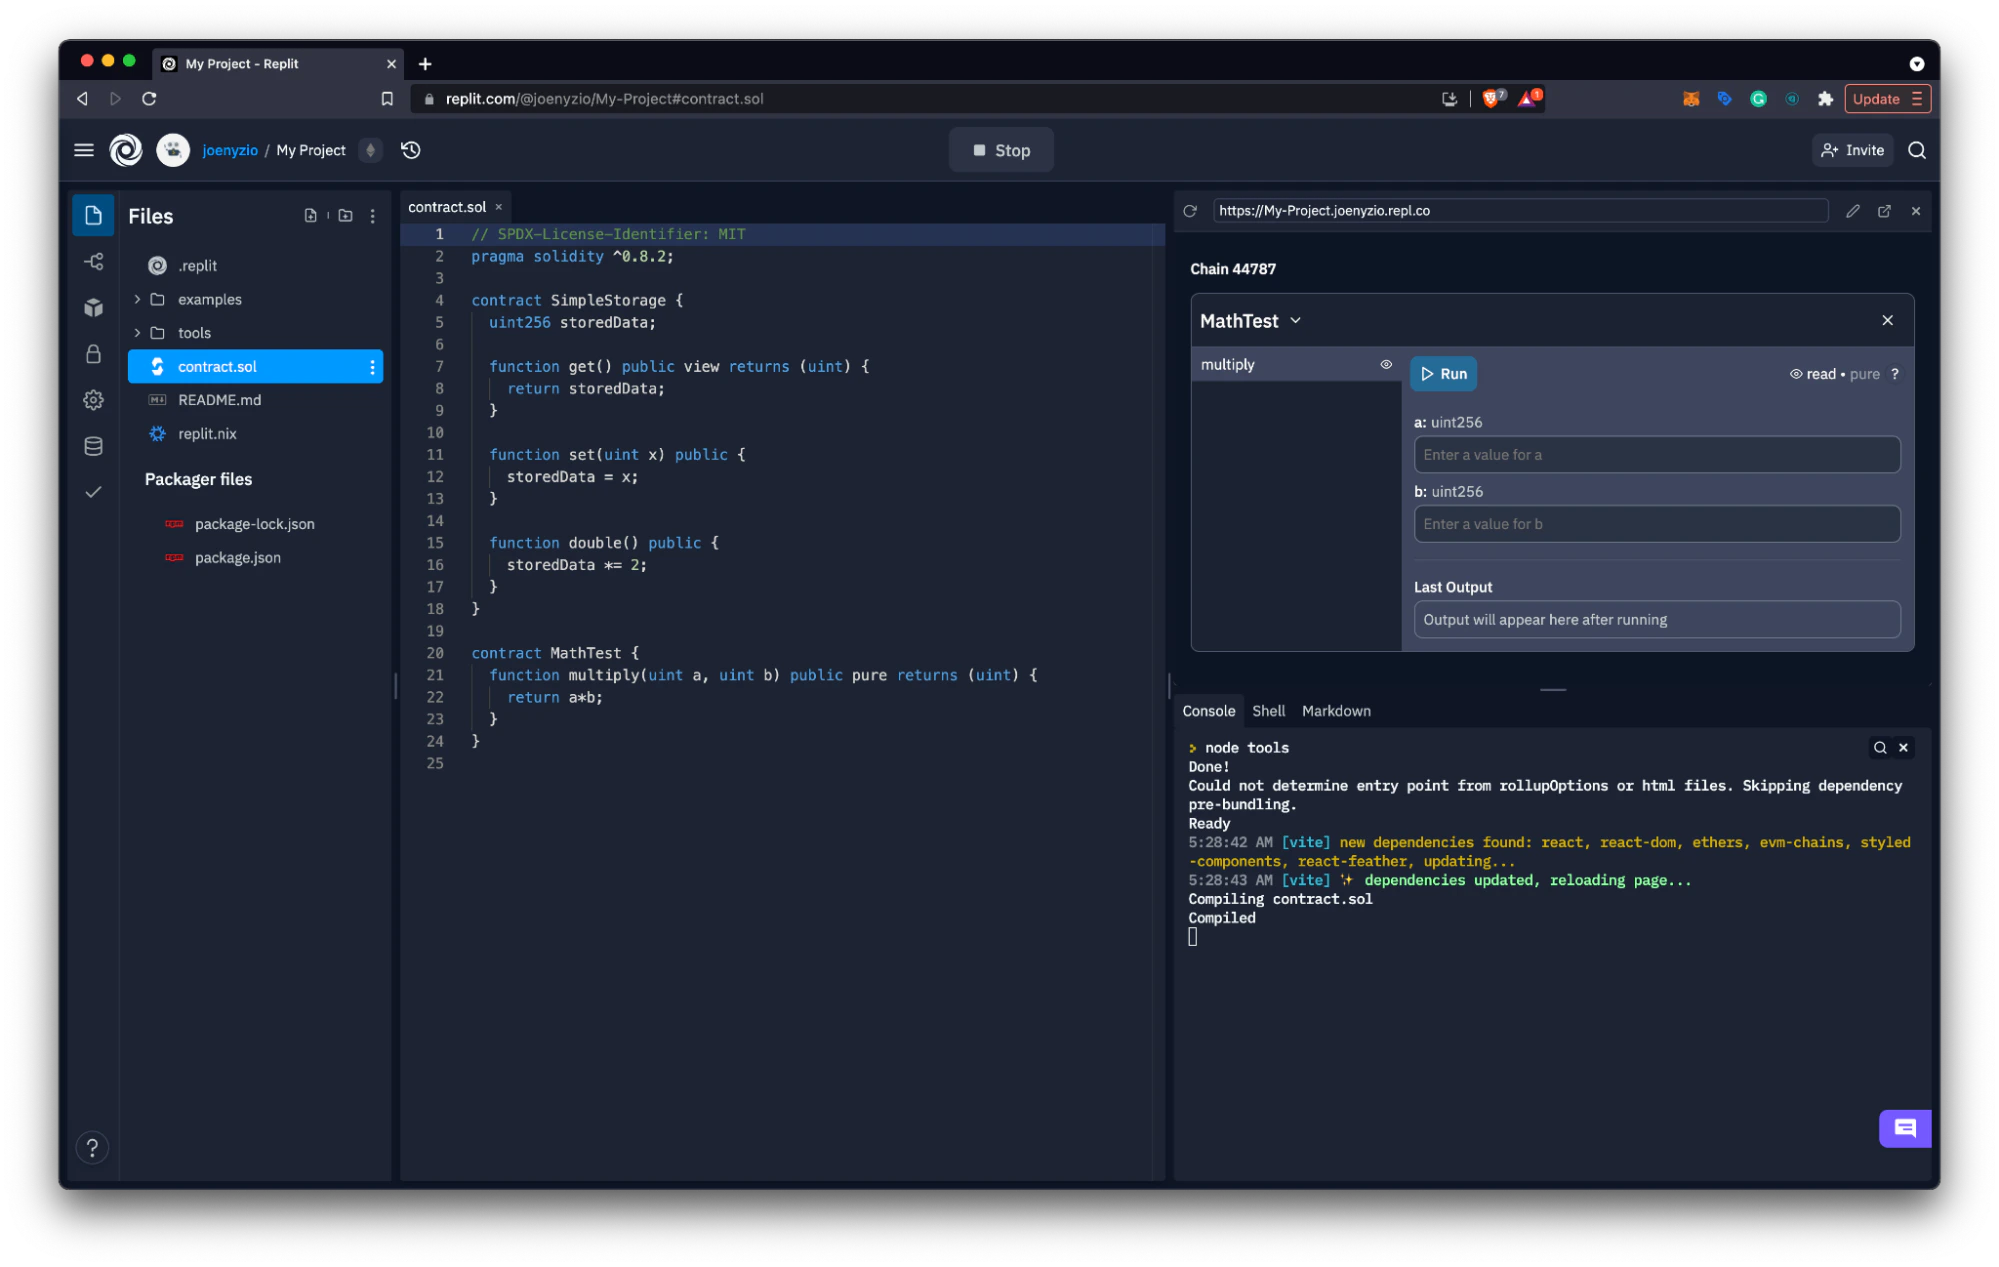
- Select the contract you would like to deploy from the dropdown (ex. MathTest, SimpleStorage).
- To deploy this contract, select Deploy and confirm the transaction from your wallet.
You can now interact with your contract using the provided user interface or from a sharable URL shown on the interface.
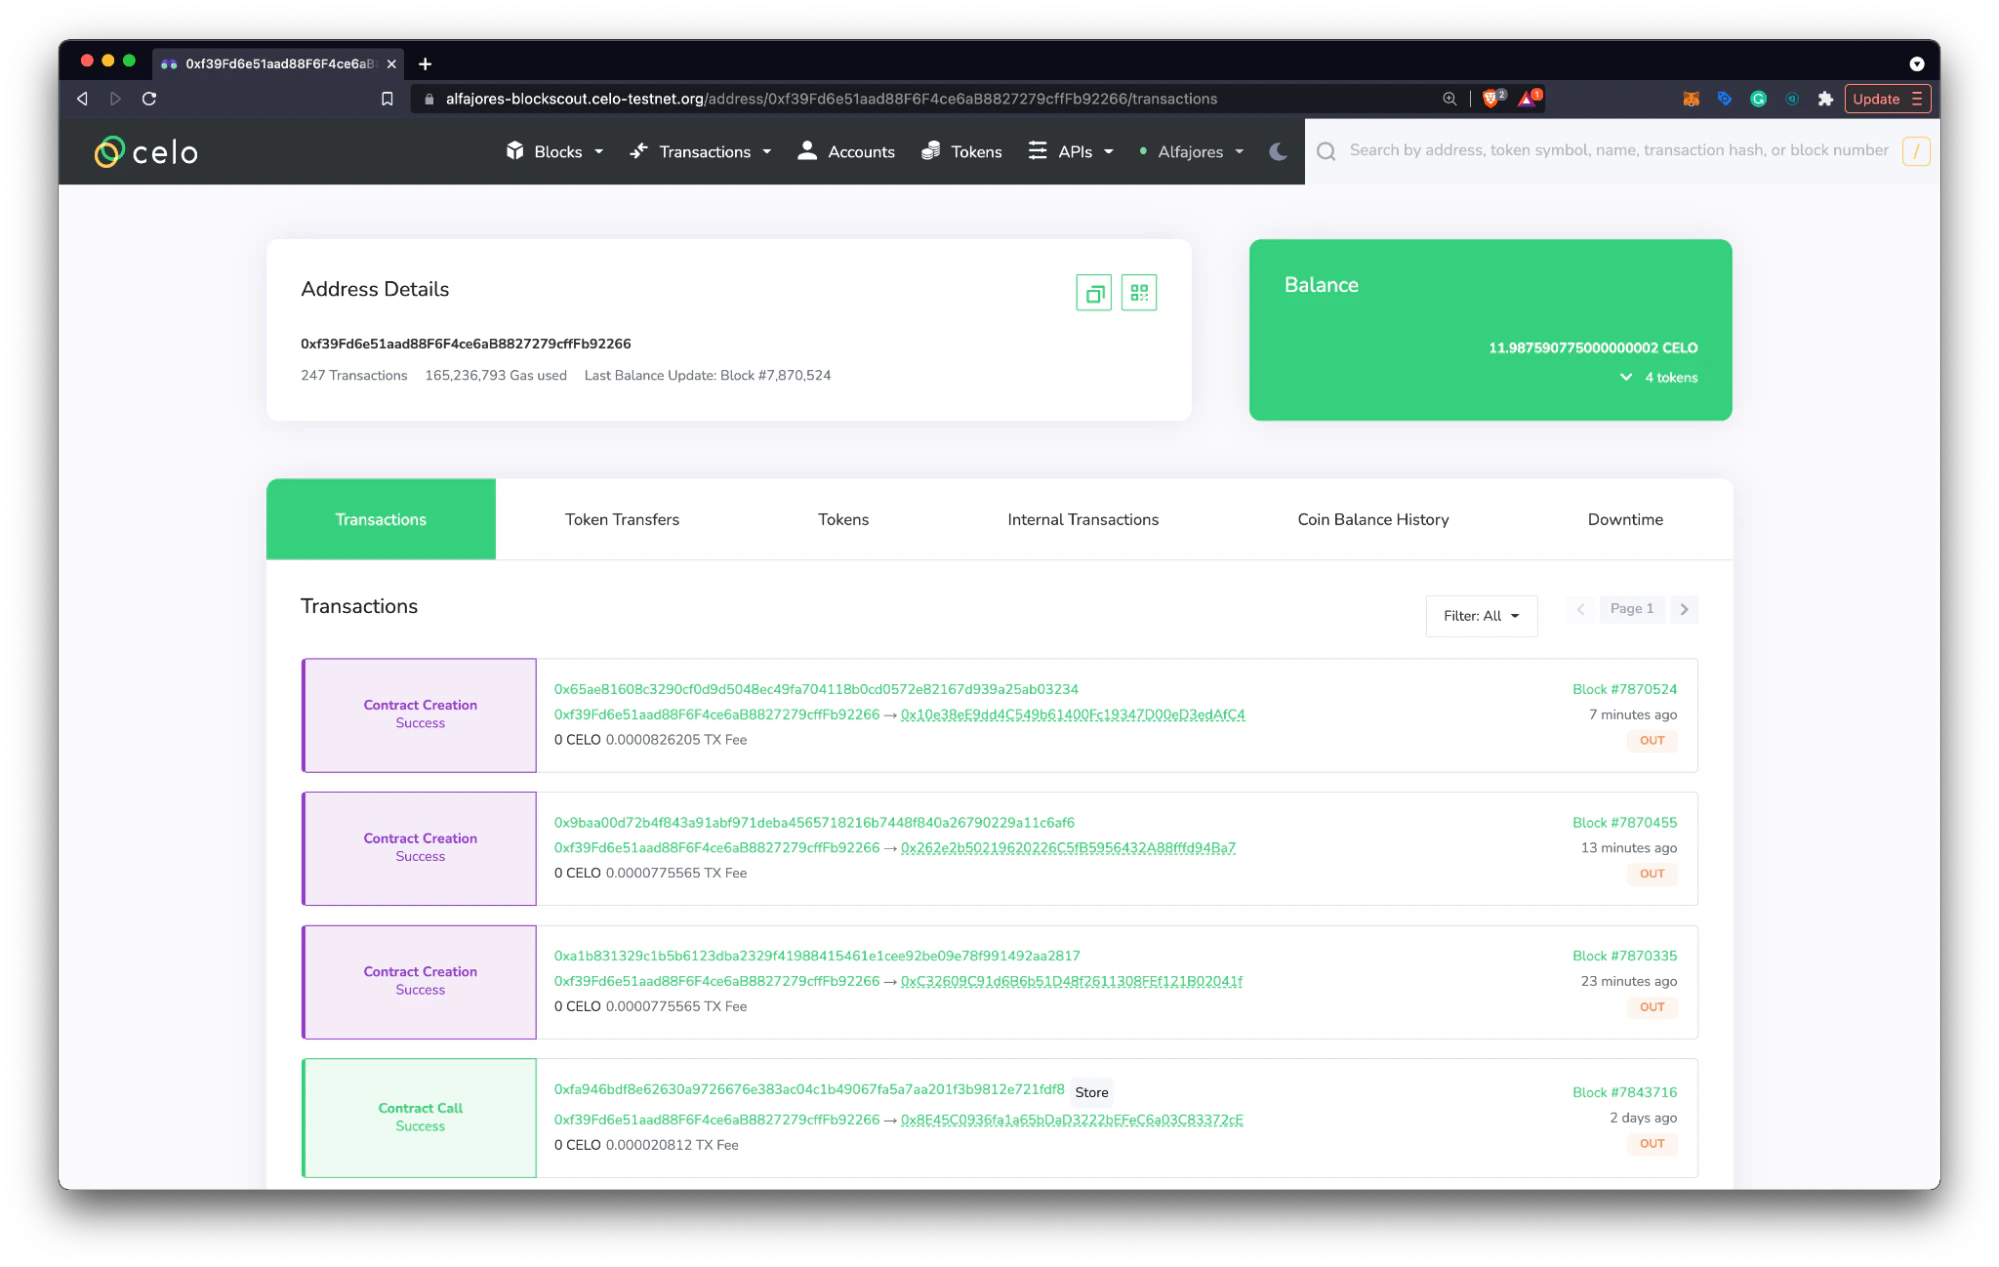
Verify Contract Deployment
To view your deployed contract, copy your account address navigate to the Celo explorer, and search for your account (verify that you are searching the correct network).
- View the most recently deployed contract to find additional information on your deployment.
Learn more about exploring the Celo network and smart contract details in BlockScout here. Update your dApp
Your dApp is now live and can be shared with the world. You can use this workspace to edit and redeploy your dApp at any time. Here are a few tips you can use to help improve your dApp.
Front-end updates
Using tools > ui.jsx you can make changes to the front end of your dApp. To start, you can update the on-screen text from Ethereum to Celo and ETH to CELO.
- Use the files panel to navigate to tools > ui.jsx.
- Update Replit & Ethereum to read Replit & Celo on (will be around lines 446 and 528).
- Update ETH to CELO next to the wallet address (will be around line 701).
After making these basic changes, users will be able to determine that they are interacting with a Celo dApp. They can use the sharable URL to visit your dApp and make transactions from their wallet.
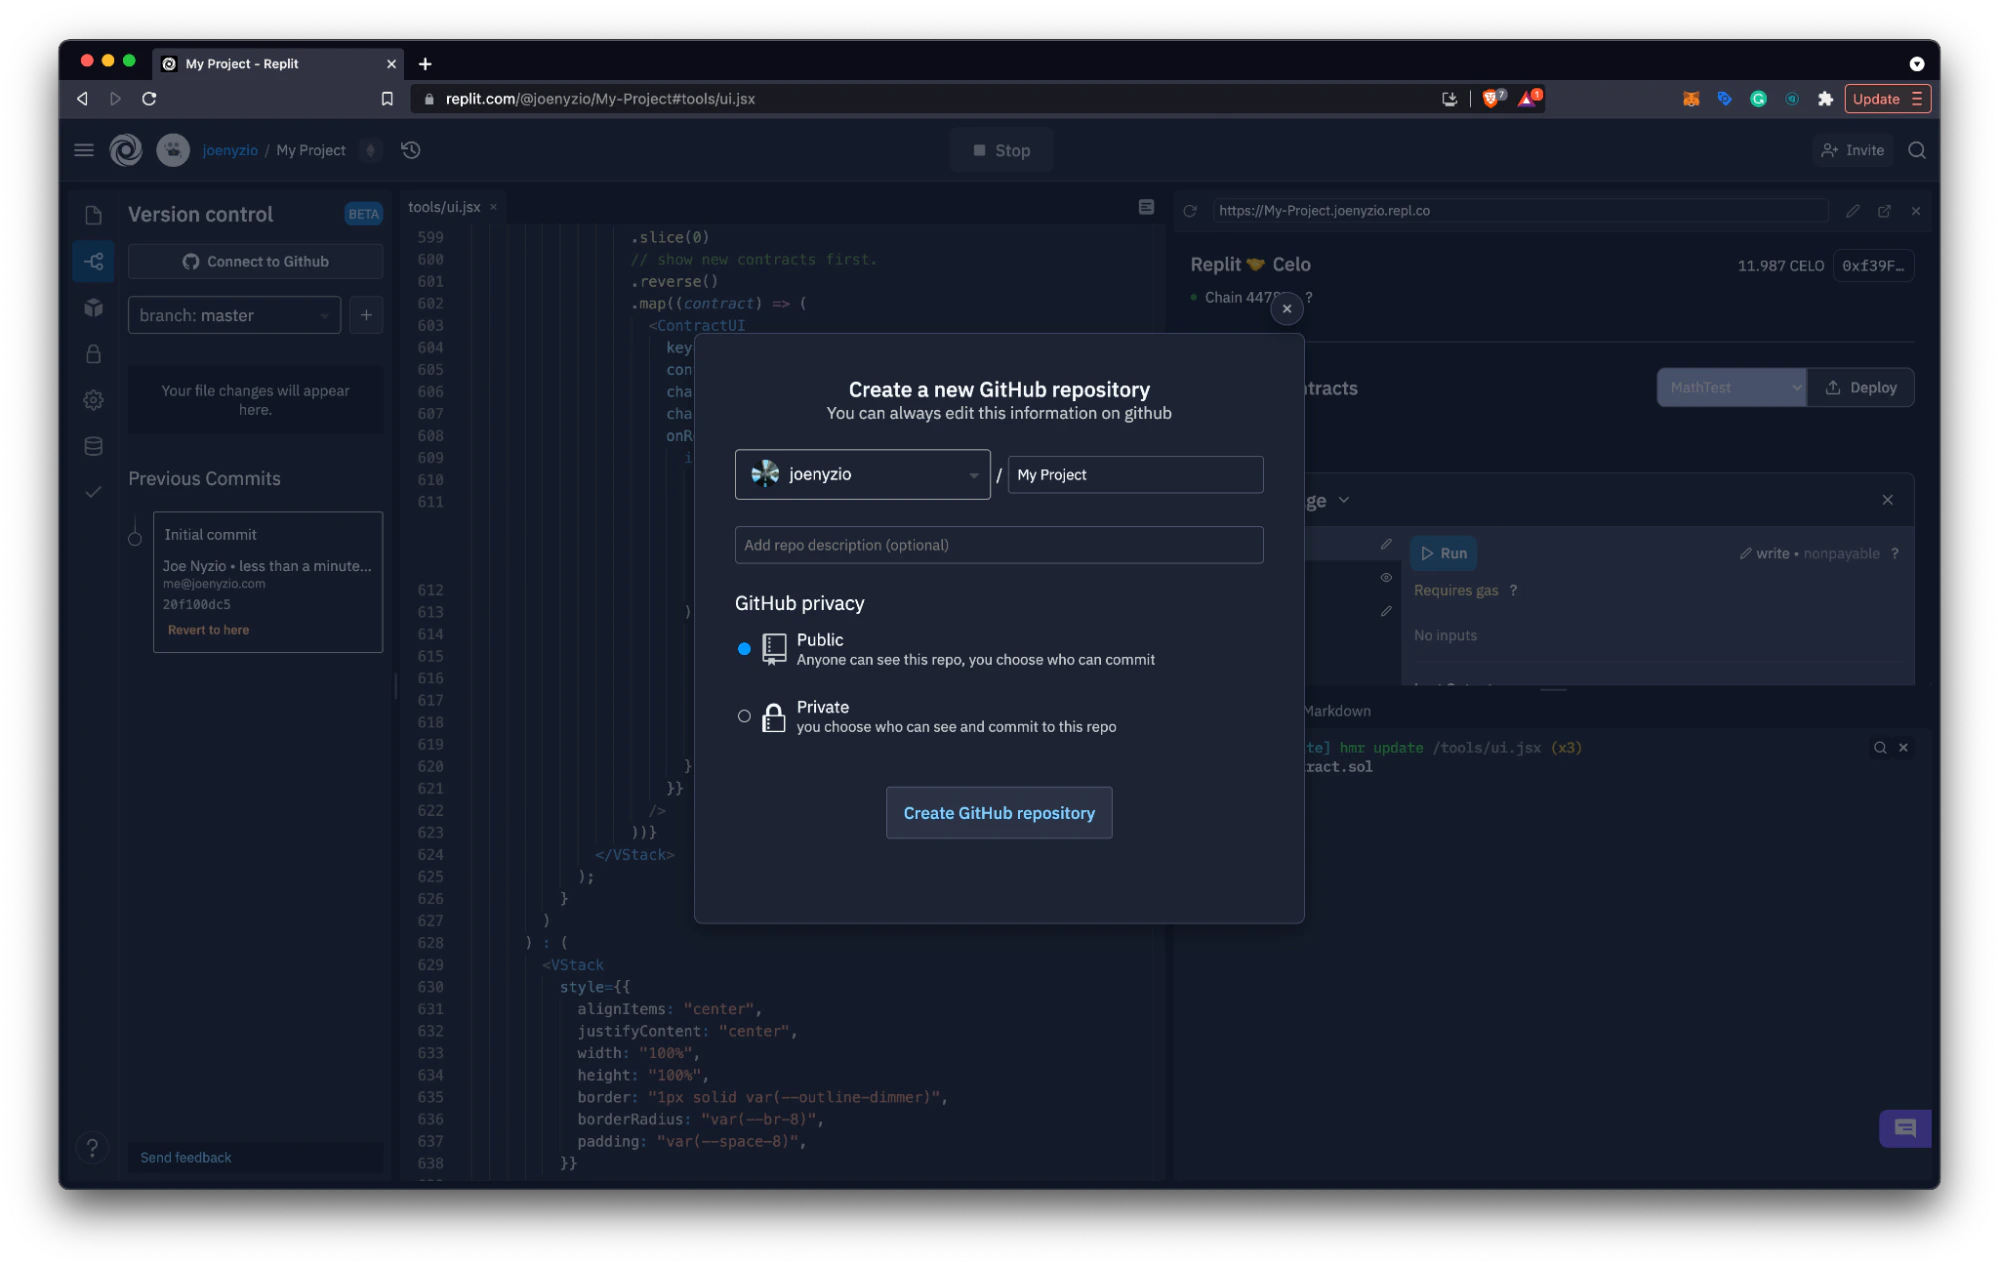
- Select Version Control from the left panel and click Connect to GitHub.
- Name your GitHub Repo, select your preferences, and click Create GitHub repository.
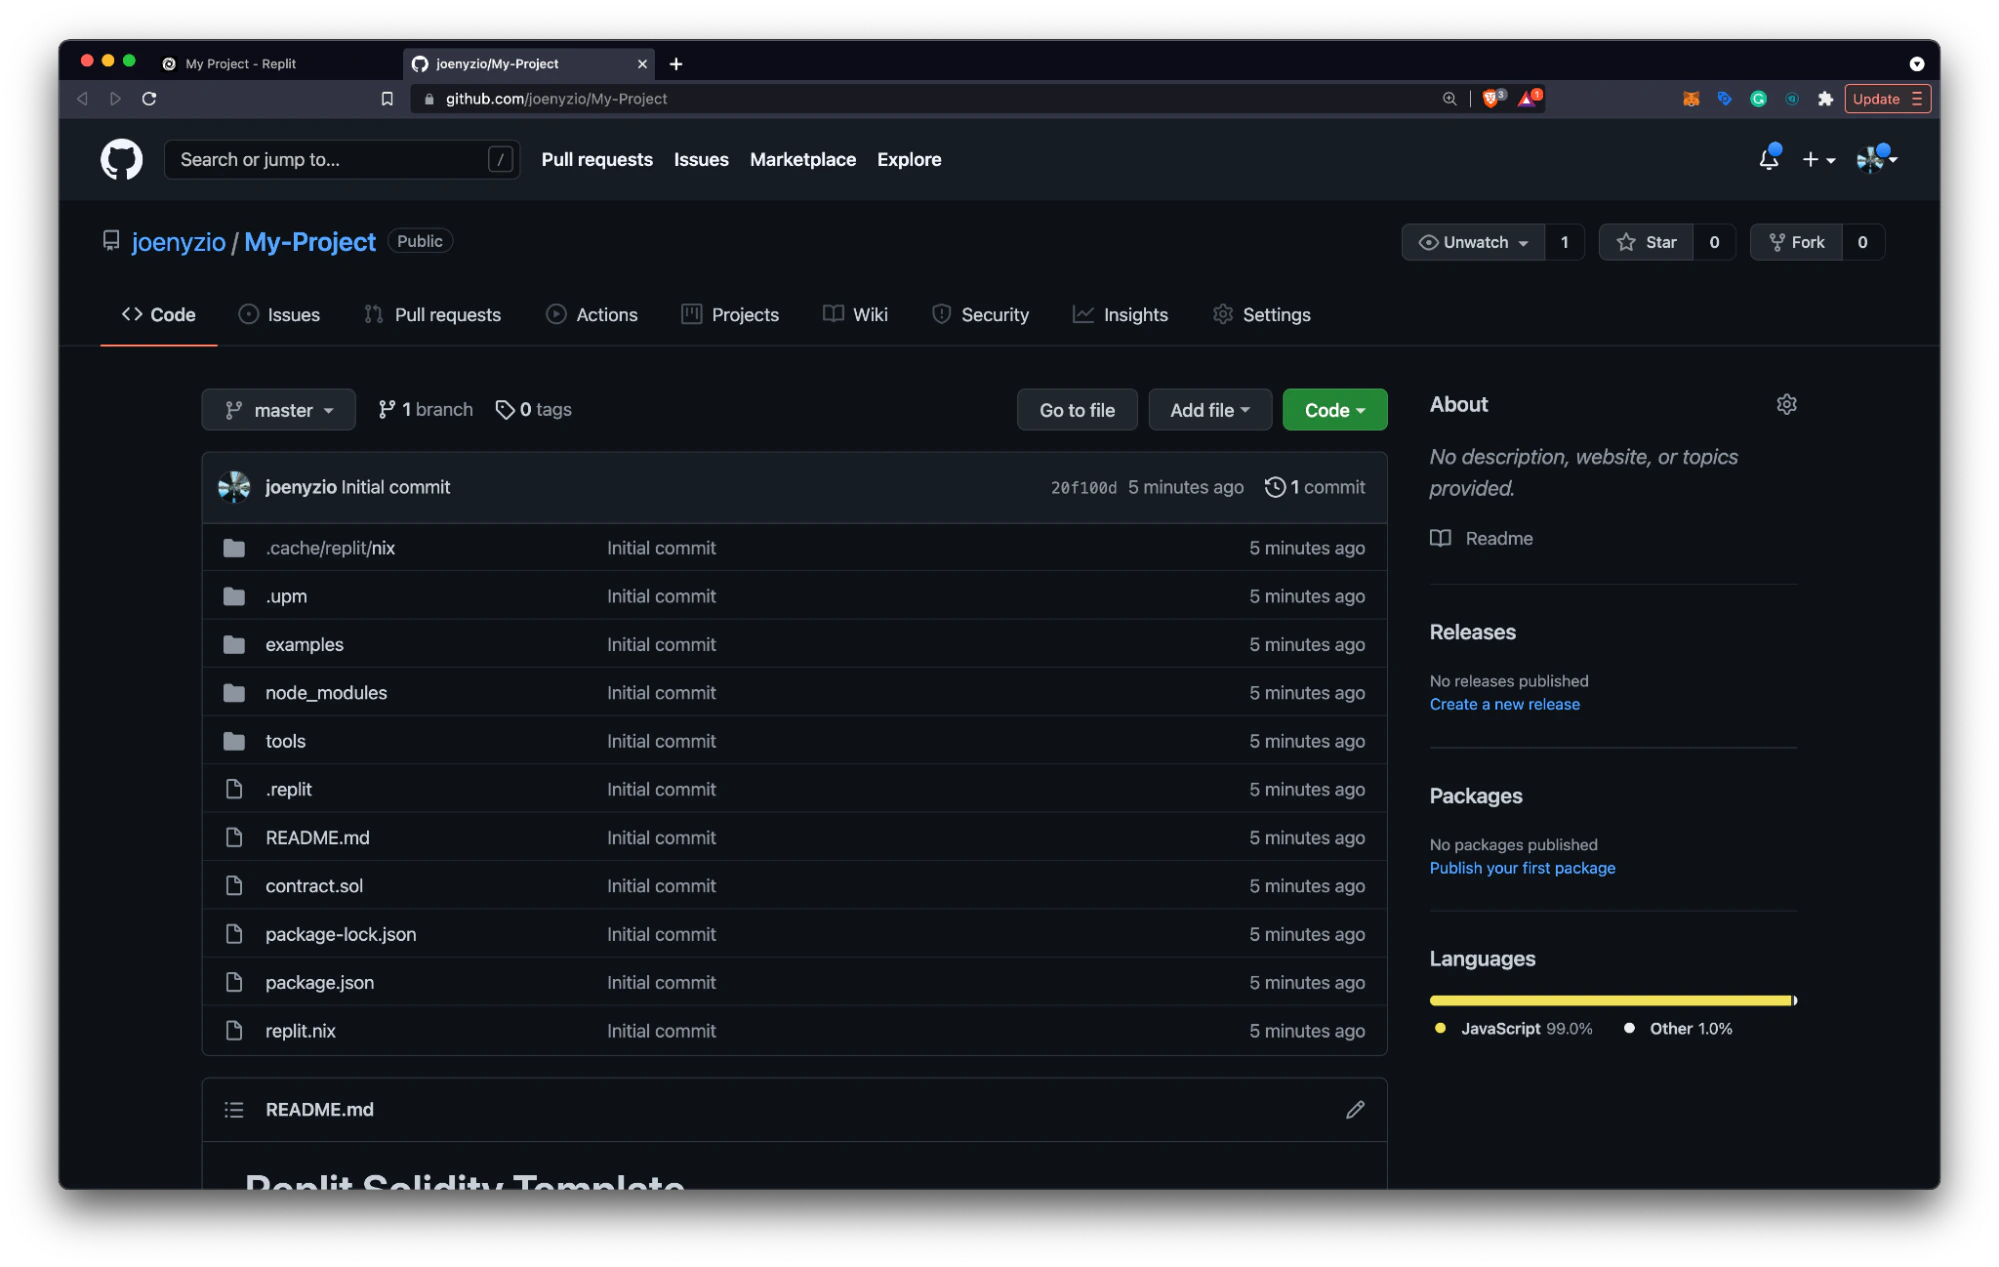
- After your GitHub Repo is created, click the Repo link to go to your new repository.
You can now manage any additional changes using GitHub from the user interface provided by Replit.
Publish to Replit
Among many other features, Replit allows you to publish your projects to a personal profile. After publishing, projects will show up on your spotlight page for others to explore, interact with, clone, and collaborate.
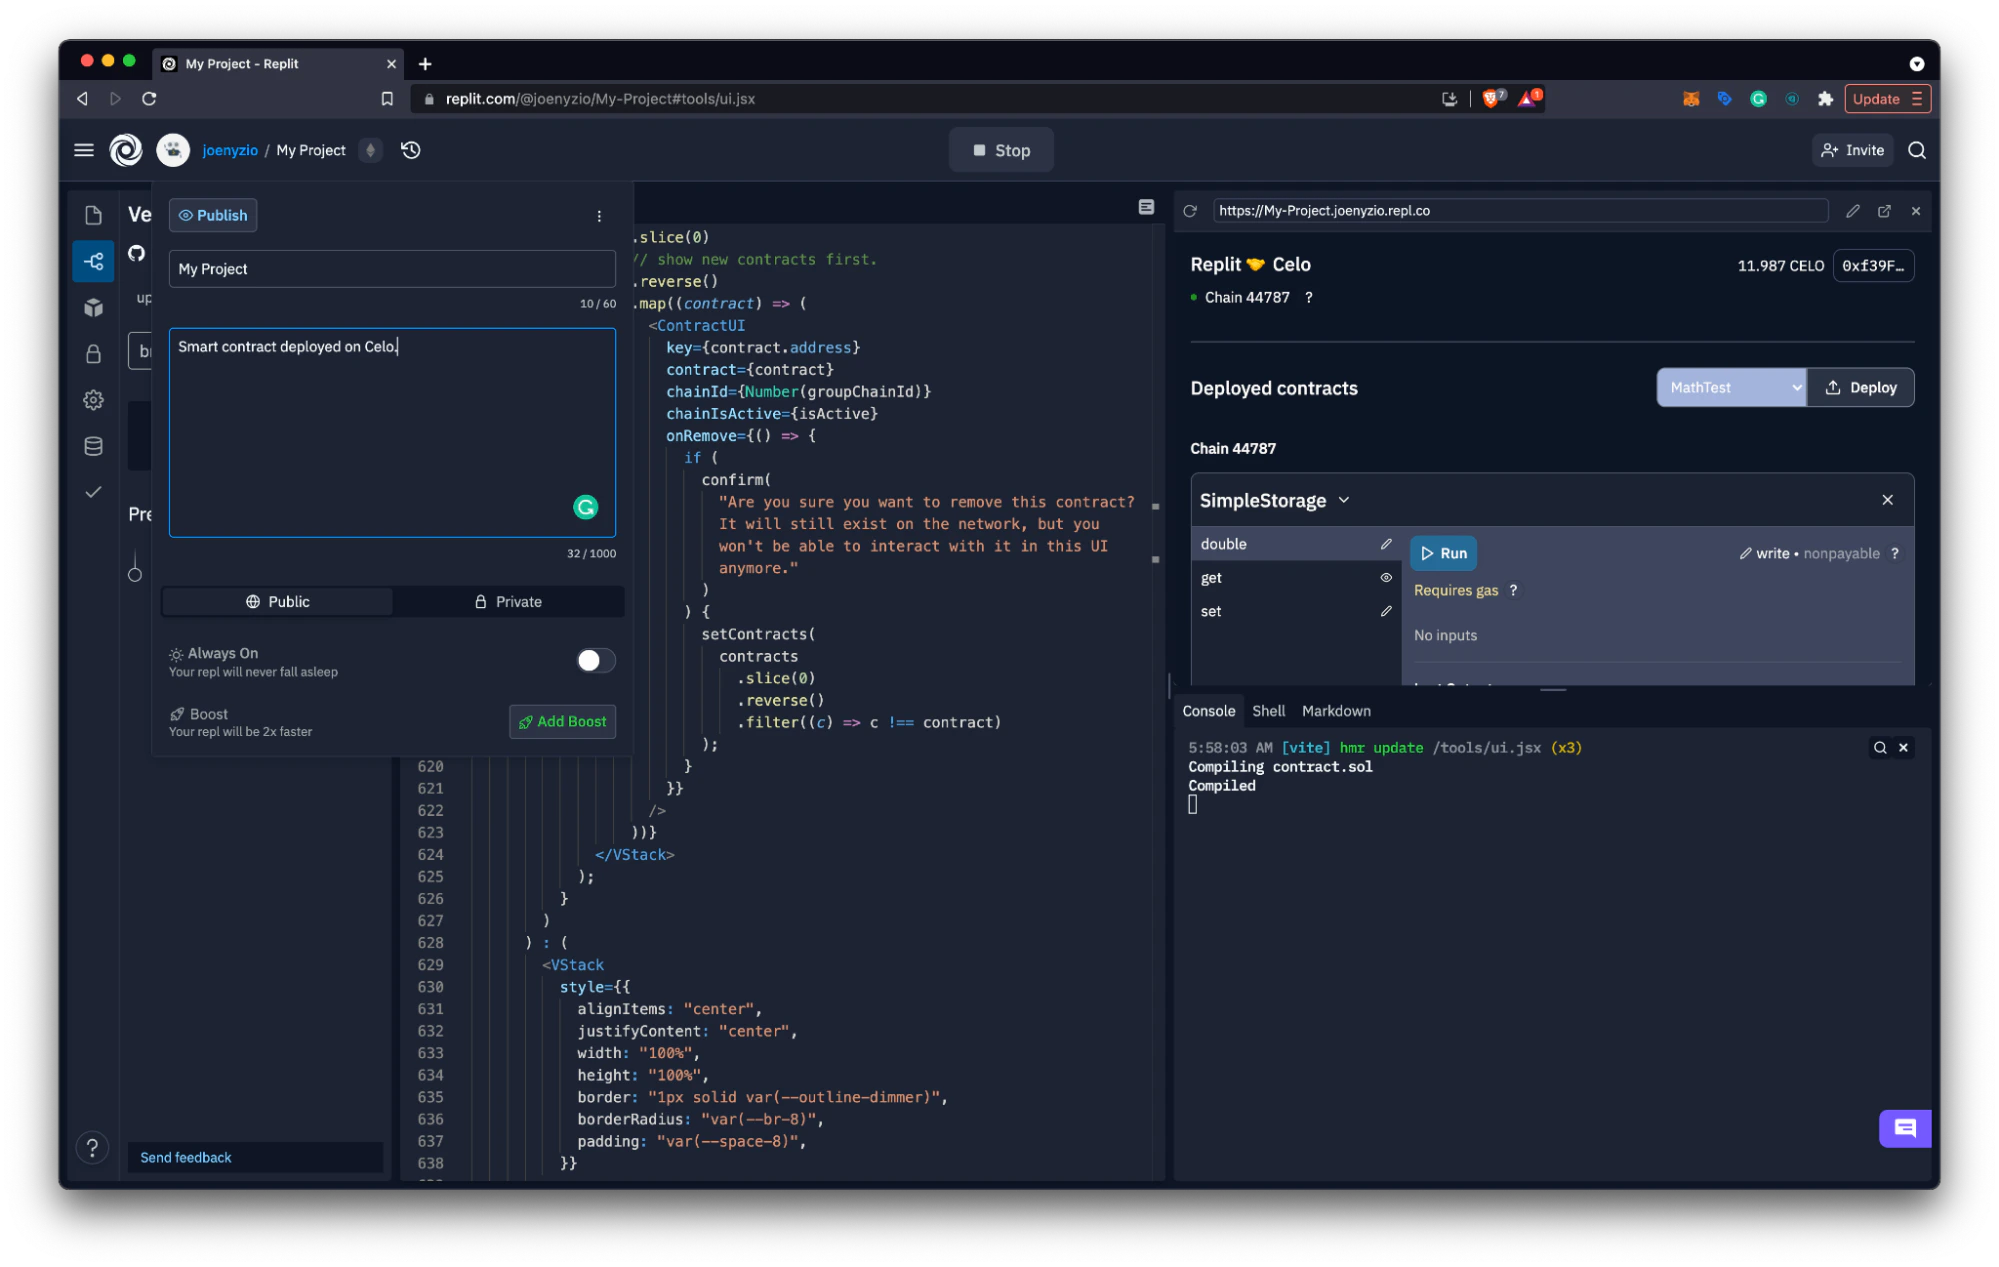
- Select the project title at the top of the screen.
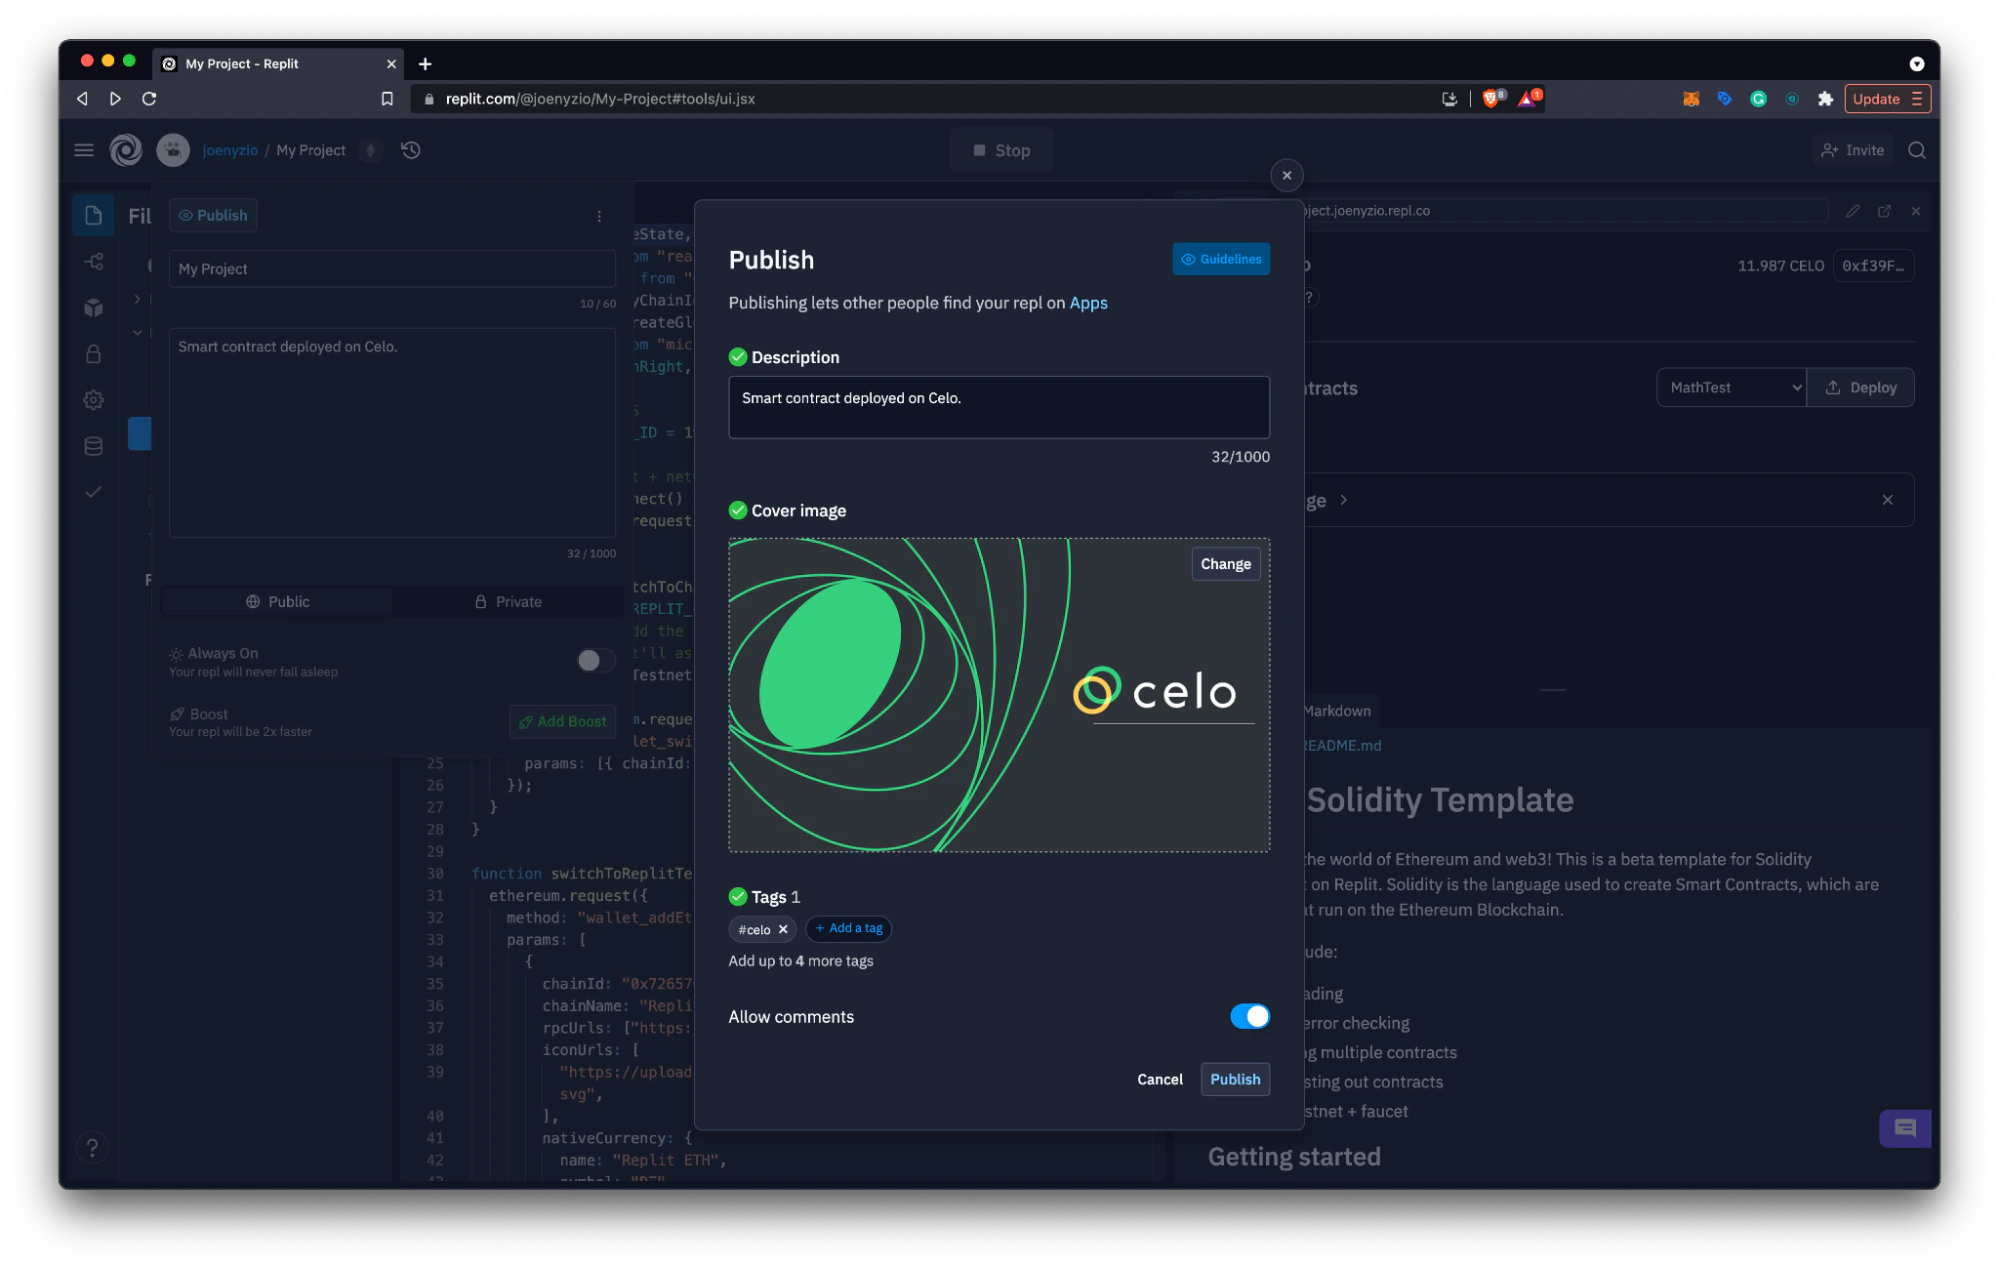
- Complete your project name and description and click Publish.
- Add a cover image, tags (try a Celo tag), and additional details for your project.
- After publishing, navigate to the Spotlight page to view your project.
Your project is now available for other developers to view, share, fork, and comment on.
Learn more at Replit.com and in the Replit documentation. Share new projects using #Celo and search other #Celo tags to find the latest Replit dApps deployed on Celo.